Showing posts with label sewing. Show all posts

Thursday, May 12, 2022

Catching Up on Christmas: Part 3


The final thing left on my Christmas catch up are the gifts I made for my brother. Quite a while ago, I purchased a couple panels of Canadian cities, knowing that I wanted to make something for my brother out of them, but not knowing what. One thing that had crossed my mind was seat cushions, so when he asked me to make him a seat cushion in the fall, I knew it was time to dig out the panels.


I had also bought some fabric with the provinces listed on it to go with whatever I had decided to do with the panels. I don't have a close up shot of that to show here. I thought I only had a little, so I used it sparingly, and then it turned out I had more than I thought, so I could have used more (especially because I don't have another plan for it)


I made an envelope-style cover, with ribbon ties coming out the two back corners. I then wrapped some foam in batting and stuffed it inside. 


I put them together in a couple groups. Quebec (above)/Ontario(below) were one set.


Then I did  a set of four that contained western cities on one side...


And eastern cities on the other.


I had a few too many panels, so I saved the west-coast ones for another project.


He also needed a new mask (since the one I threw together 2 years ago for use for a few weeks had been well worn). This year, he got season's tickets to see the Kitchener Rangers play (when we could do things in person), so I made him a mask to wear to the games.


I think I have now caught up on posting about last year's Christmas gifts. It's probably time to start working on this year's gifts :D.

Tuesday, May 10, 2022

Christmas Catch Up Part 2: Just What You've Been Weighting For

For Christmas, I gave my mother a box with some fabric, some weighted pellets, and a note that said "sewing included".

I knew she wanted a special size of weighted blanket, but I wasn't sure exactly how heavy she wanted it or what size she wanted, so I thought it was best to confirm these things before I put the work in.

For anyone interested in making a weighted blanket, let me just say that, in my experience (as is the case with many homemade things), it certainly didn't save me any money to make it myself. I went back to Michael's on a regular basis to buy one bag of pellets at a time. Which was difficult because there were a number of bags that had ill-formed pellets that I didn't want. So I ended up with two very different colours and sizes of pellets.


I also picked up what I think was a cloth shower curtain from the clearance section at Marshall's. It was a really fun print, and a bit bigger of a print than you would generally get on a quilting cotton. Plus, because my mom wanted a smaller blanket, I was able to use the curtain for both the front and the back. And even with all these cost savings, it was still over $60 to make basically a child-sized one and that doesn't include any of my time.

After I had confirmed what size and weight she wanted, and collecting all my bags of pellets, I got to work. Step 1 was to decide on how many sections I was going to split the blanket into and then evenly divide the pellets across the blanket.


I borrowed my friend's kitchen scale and (after some quick math), measured out the pellets. I ended up having 70 squares in my blanket, which meant I needed 70 different containers to house everything. Good thing I had been saving sour cream containers over covid :D. 


It was also a good thing I had borrowed my friend's scale and not just tried to do it by volume, since it turned out my pellets were very different sizes (even though they were all the same brand). This meant I had some squares that were far more full than others. 


I left an edge around the outside of the blanket by stitching about 2" in from the 2 sides and the bottom. I then marked and marked and marked - it was a lot of marking. I made my squares 4", and I didn't want to draw full lines because I wasn't sure about getting them out when I was done, so I had to put ticks frequently enough so I could know where to stitch.


I sewed channels down each column so that they were stitched all the way from the bottom to the top. Then I went along and dumped one container's worth of pellets into each channel. I used a paper rolled into a wrapping paper tube at first to help guide the pellets to the bottom. I also then pinned down the fabric above the pellets to help hold them in place once I moved it around to send it through the machine. This was especially important in the squares that had a higher volume of pellets in them. 


I stitched straight from one side to the other to close off a row, and then would start all over again, shoving pellets down channels. It's certainly not a hard project, but I will say it got tougher the fuller the blanket got, since it was getting more and more heavy and pulling as I was sewing. Eventually everything was full and I closed off the top. Then it was time to pick a binding. I had decided to bind it so that I could just stitch straight from one side to the other every time and not worry about how the end was looking from doing some reverse stitching.


In the end, I decided on the grey binding. I was really happy with how it turned out, and my mom seems happy with the end result.


On a side note, I had considered a weighted blanket for myself, and did try out the one I made my mother for a couple nights before I was able to give it to her, but hadn't thought more about it. Then the other night when I was at the store, they had one in clearance about the size and weight I probably would have made for myself for a lot cheaper than I could have made for myself, so I decided to go for it. However, I had walked to store, which meant I was walking my new 12 lb blanket home with me. It came in a box with a handle, so wasn't too bad to carry, but I sure would have preferred if I could have carried it as 6 lbs on either side :D.

Sunday, May 8, 2022

Catching Up on Christmas

Next up on my backlog is posting about projects I made for Christmas.

Don't let this post deceive you, they were done before Christmas, I just didn't post about them.

Some time last year, I hemmed a curtain for my friend to use across her under-the-stairs storage. When she wasn't looking, I snuck the cut-off home with me to use at a later date. I decided Christmas was that later date.

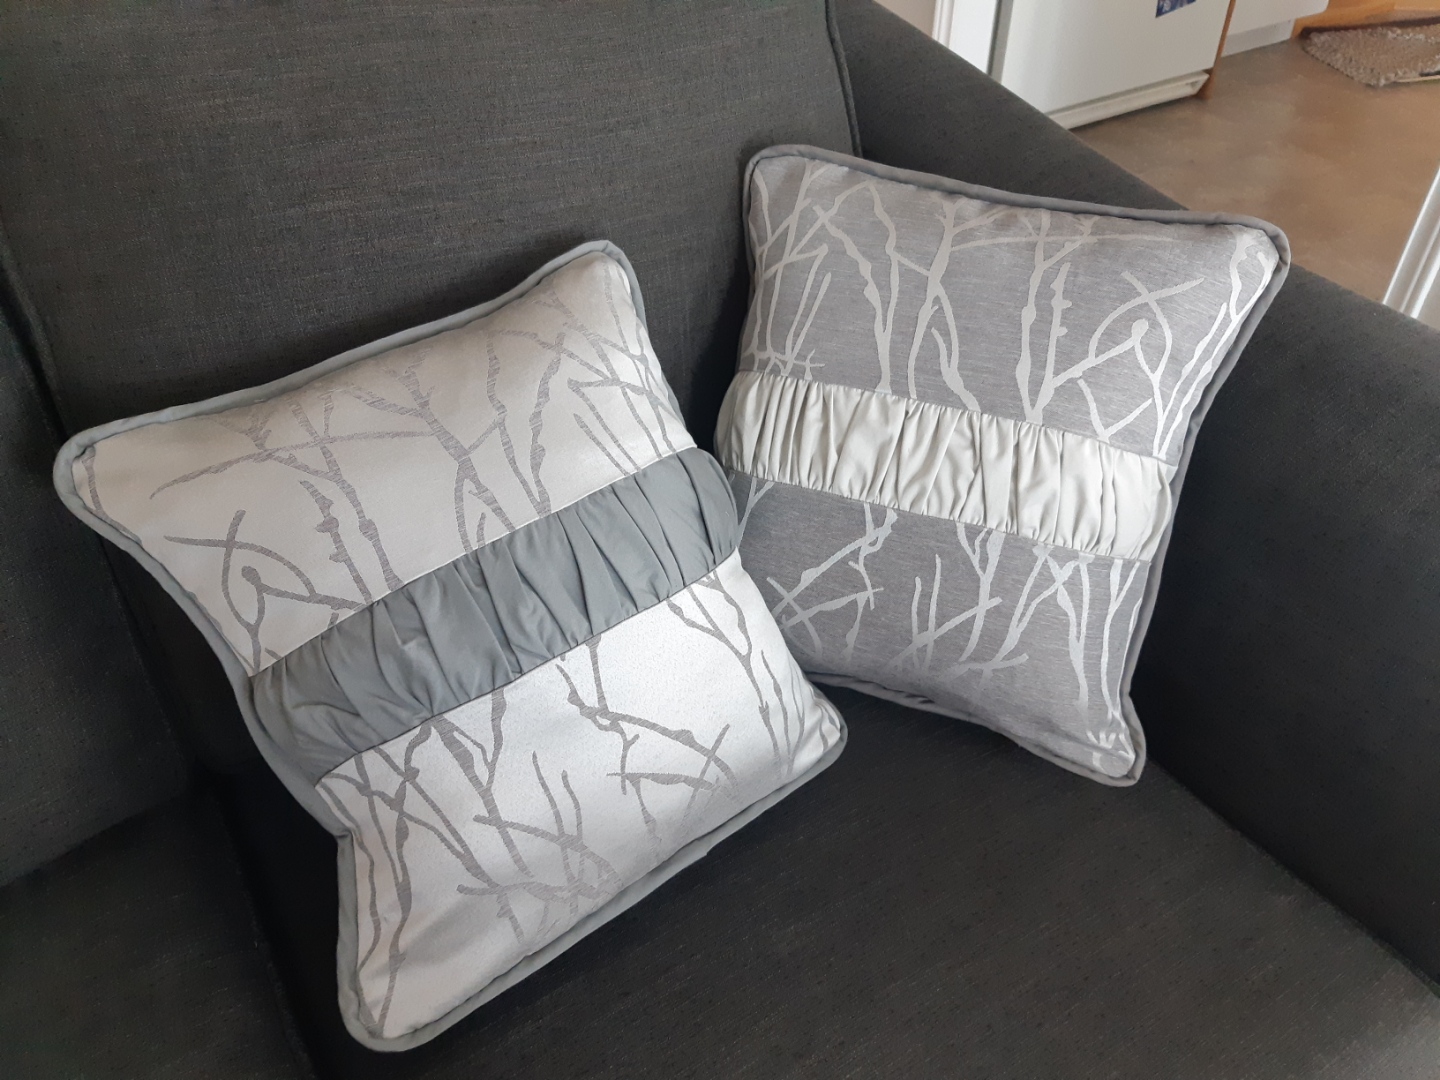
She just finished a basement upgrade (well her dad just finished it) and so I decided she could use some cushions for her new living area to match her curtain. The fabric sides were inverse of each other (dark with light branches and light with dark branches), so I decided to take advantage of that and utilize both sides.

I also decided to add a ruched bit in the middle. (I originally saw this idea in a magazine I got for Christmas one year, though when I wanted to confirm the length of fabric I might want to use, I could not for the life of me find the magazine).

One thing I will say is that this fabric really had a life of its own - and staying square wasn't high on it's priority list. So to make my life a little easier, I used freezer paper on the back of the fabric until I was done attaching it to everything, and that really helped.

Another thing I added was pipping. The Seasoned Homemaker has my go-to pipping tutorial. I have used it a countless number of times.

I didn't have enough fabric for all of that out of what was left from the curtain, so I used some grey cotton from my stash for the ruching and pipping. I went with a darker pipping and lighter ruching on with the dark side of the fabric, and a lighter pipping and darker ruching for the lighter side of the fabric.


With the ruching, the pipping, and the curtain fabric, I think they came out looking very professional, and not at all like a homemade pillow.

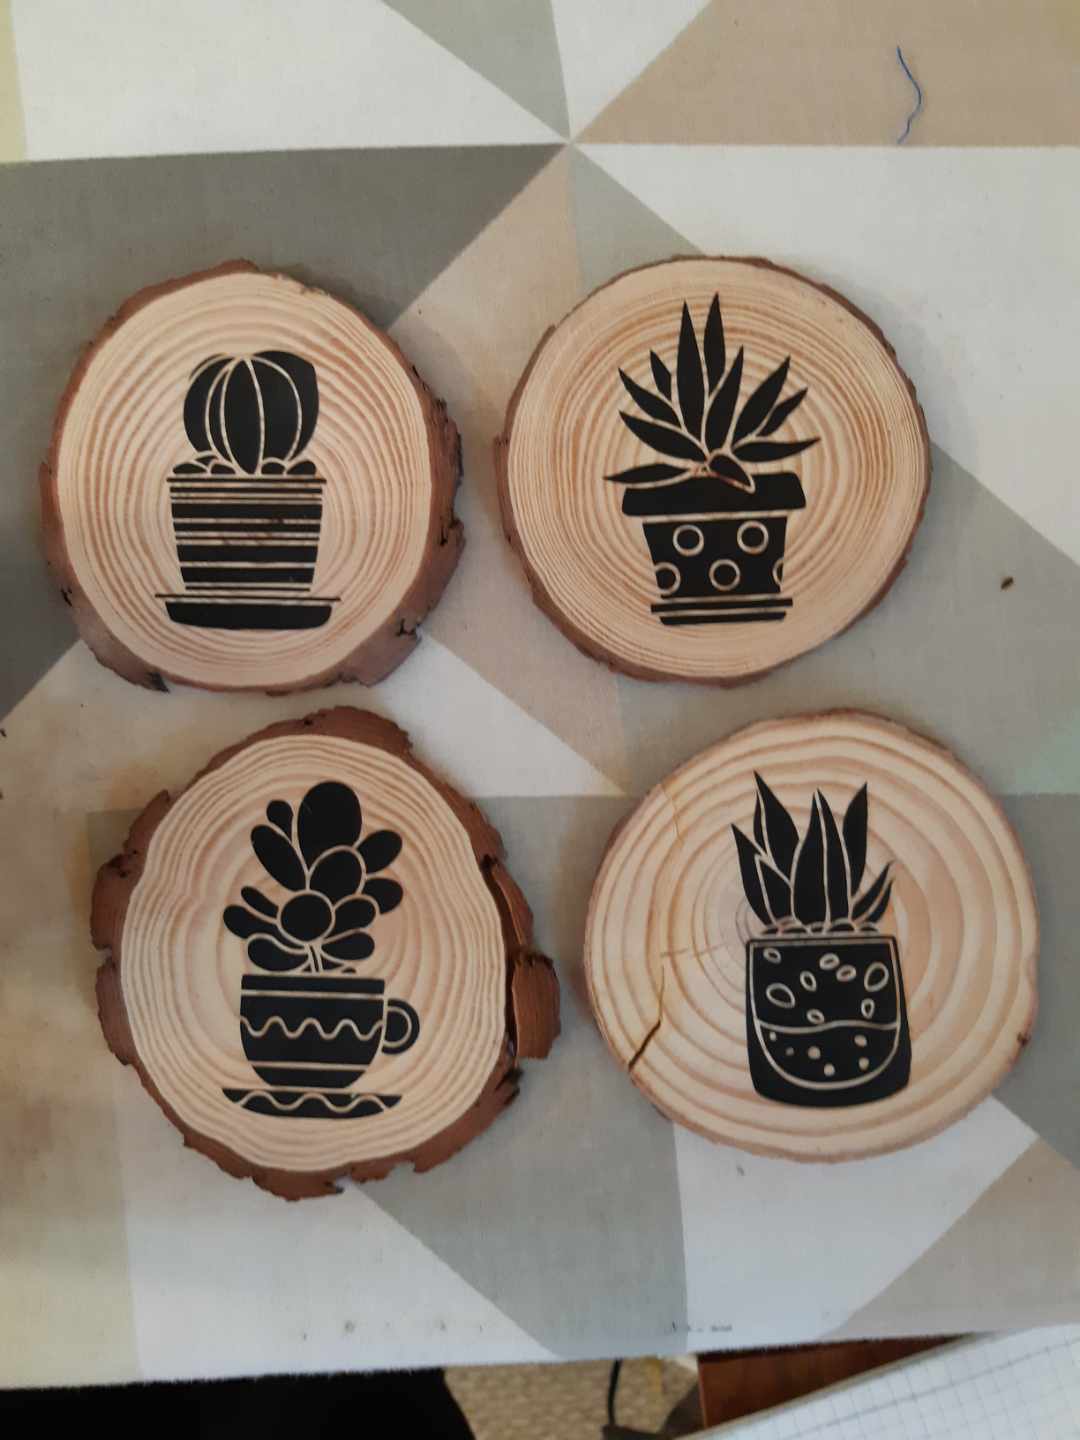
For the same friend, I also utilized some new skills on my Cricut. I had bought some wooden coasters and wanted to jazz them up. She always has so many lovely plants in her home, so I decided I would go with that for a theme.

Test run in vinyl on paper

I found some designs I liked, cut them out of iron-on vinyl, and attached them to the wooden coasters. That's the white-washed version of how things went (and how I planned it, because you know, I watched a 5 min youtube video). In reality, I started too late, didn't have everything planned, and was trying something completely new. So I was in my craft room at 10 PM the day before Christmas Eve (when I was leaving at lunch the next day and hadn't packed yet), freaking out because nothing was working.

A couple things I learned: First, not all wooden things are created equal. Part of the problem was that my surface wasn't smooth enough. Thankfully I had some sandpaper that I could take to it, and after sanding it down for a while, it went much better. Second, small pieces are trickier. Originally I was going to just do the outline, but there wasn't really enough there to stick down. Even as is, with the transfer tape on top of it some of those pieces just didn't want to stick and I had to go with the iron straight on it (but not for too long or that was also a problem).


Did I have to cut the first one out multiple times because I ruined it trying to attach it? Yes. Did I have to glue felt to the bottom because I ruined one side of one of them and had to turn it over and use the other side? Yes. But, overall am I happy with them? Yes. 

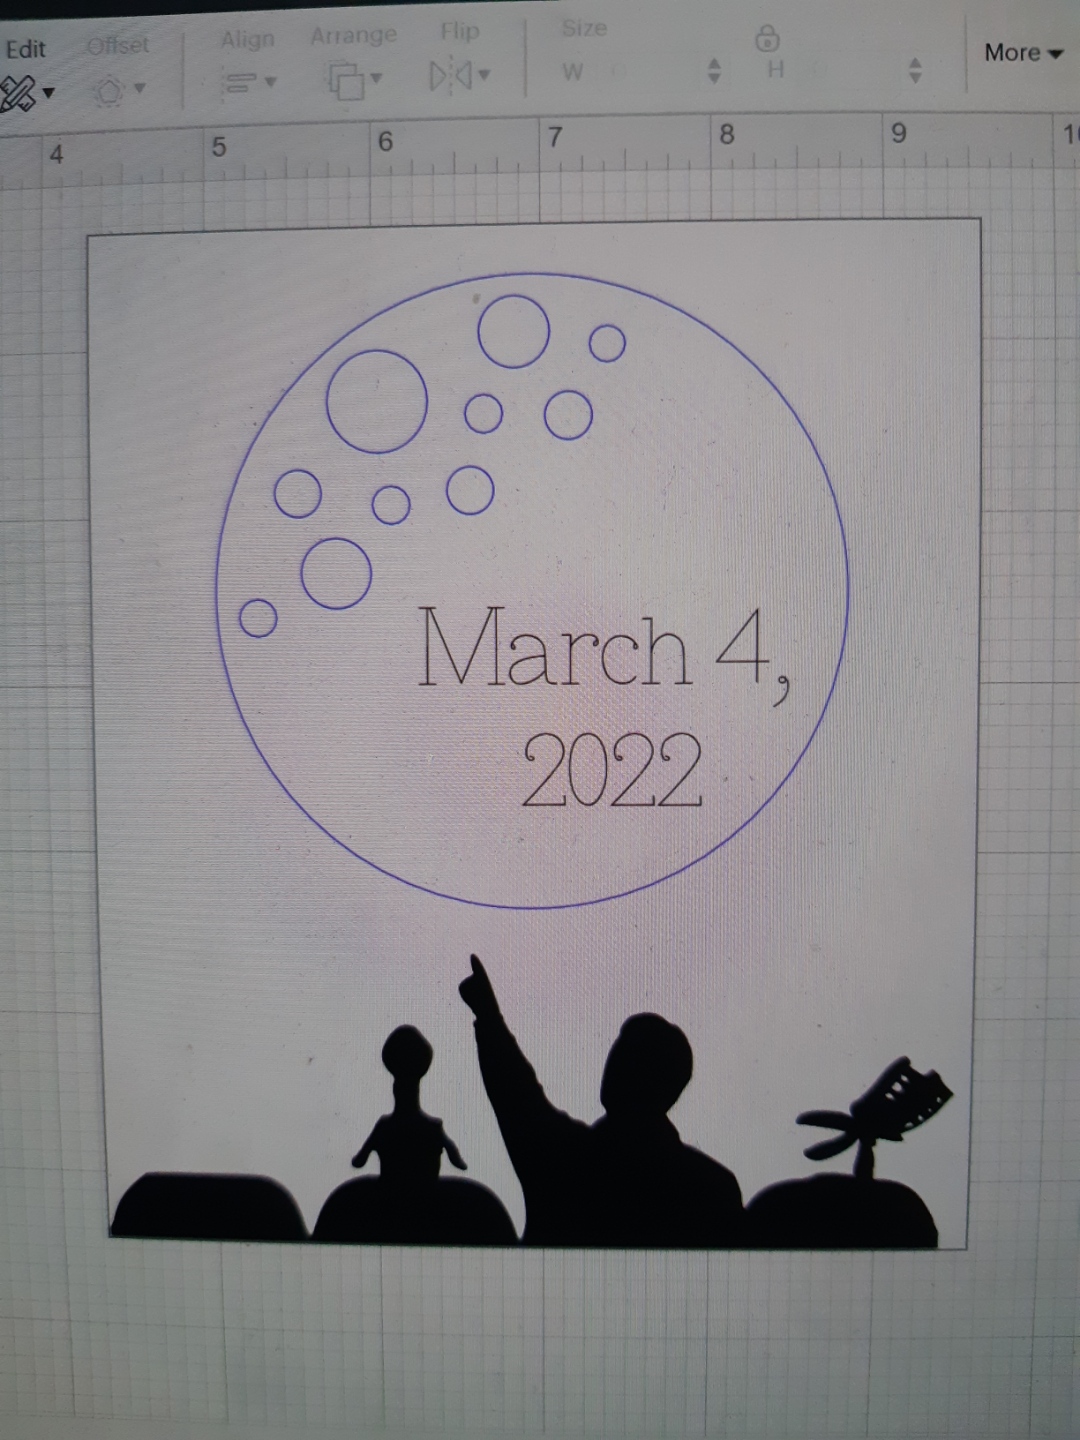
While we're talking Cricut projects, I'll also show you the card I printed for my Dad to tell him we helped kickstart a new season of Mystery Science Theatre 3000 on his behalf (it's a nerd thing).


Apparently I didn't take a picture of the finished product, just the plan. The finished product basically looked like this :D. 

Tune in next time for more "Things I made at Christmas, but am only posting about now" :).

Wednesday, March 16, 2022

Gifts for a Friend: UK Edition

I have a friend who likes all things London/UK. So when I find fabric that fits the bill, I grab it and then (try to) come up with something to make her.

Thankfully she's the kind of friend who asks for things she wants, so a while ago when she asked me to make her a grocery bag holder, I knew exactly what fabric to dig out.


I bought this fabric when I was visiting another friend in the UK, and I hadn't yet come up with what I wanted to make for her out of it.


A grocery bag holder is a very practical thing, and also super easy to make.

Her next request was for a double oven mitt. I had just enough fabric left to fulfill this request. I used a tutorial provided by the Crafty Gemini:


First I auditioned fabrics for the ends and the binding.


I ended up deciding to keep it uniform - it showed off the fabric better.


I also ended up using some biased binding that I had bought a few years ago at the thrift store. I also had basically exactly the right amount of thermal insulation for this project.


Finally, I found this panel in the clearance section at the fabric store this past year, and knew I needed to get it for her. 

I spent some time thinking about what I might do with it, but I wasn't coming up with any great ideas, plus the sashing didn't seem to lend itself to being cut apart and sewn back together.


Instead, I kept it together as a single panel and just quilted it.


I machine quilted it with my walking foot, following the diagonal lines in the Union Jacks, but switching direction in the middle. This made v-shapes along the edges and a diamond in the middle


I varied the width between the lines, which were fairly close together and it ended up being a lot of quilting (went through a couple small spools - thankfully the store had 1 spool of the colour I needed when I got there, though it took a while to find).


I thought she could use it as a table runner, a couch runner, or a lap blanket, depending on how she was feeling.

And so ends the recap of some of the UK-themed gifts I've made for my friend over the last few years (there have been more gifts, but I didn't have easily accessed photos of them).

Friday, January 8, 2021

Sewing Party

I know this post is a little late, but I figure it's better late than never.

At the beginning of December we had taken some time off hoping to go see my grampa for his 85th birthday. Unfortunately, because of covid, we weren't able to do that. Since we already head the time off, we decided to make the most of it.

My mother came over for a couple days of sewing and errands. 

She had a quilt top she was prepping to get into the frames. She finished up the hand appliquing, with a few consults on placement. 

This design is a free pattern called Paisley Splash. Once the applique was done, she added a border. I didn't get a picture of that until it was in the frames at Christmas time. 

We both had aprons to make as Christmas gifts for almost 3 year olds as well. We used Sew Simple Home as inspiration, but drew up our own pattern. I chose to use 2 cottons and make a double-sided apron to make it a little sturdier.

I was told my recipient likes yellow, so that was my inspiration as I dug through my stash. I chose to use a plain fabric on one side in order to add a pocket and an initial.

I got a great smiling picture of the recipient on Christmas morning. I hope it gets used to make many delicious things, but more importantly to have great family time together.

I also made a couple of snakes for a couple of big brothers to celebrate the birth of their sister. This is a pattern I have printed out, but I can't find it online again. I chose to make one longer for three older brother and one shorter for the younger brother. These are fun and pretty quick to make. 

In addition to sewing, we went out for a ski/snowshoe. The weather was beautiful and we had just enough snow, so we headed to the local golf course to frolic for a bit. It was a lovely break from the sewing machine. 


We also had a lovely trip to Shakespeare to get some quilt batting from the local quilt store. While we were in town we hit up the local pie store for butter tarts. We had to wait outside in line in the cold, but it was worth it! A visit to the British shop rounded out our trip. 

In the evening we went to the park to enjoy the Christmas lights. There was a new display this year of timbits playing hockey. They looked like glowing bowling balls 😀.

We had a great time together, and got lots accomplished. It was just what I needed. 

Friday, May 1, 2020

Fabric Balls

I have been going back through my old photos to find craft projects that I haven't posted about. Probably the thing I make the most are fabric balls. I can't even remember why I started making them, but I do find they are a great gift for young children. They are easy and quick to make, they are cute, and they use small amounts of fabric - so are great for scraps. I especially like to give them as gifts to older siblings when younger siblings are born.


To make them you just need to print off a pattern, cut out the pieces, stitch them together, and stuff them. I like to use the Fabric Beach Balls pattern from Purl Soho (though I always skip the circles over the ends - mostly out of laziness). The pattern comes in 3 sizes, but you can also print it at difference zoom levels to get other sizes. I like the shape of the ball that is created by the 8 sections.

Once I started making those, I was also drawn to fabric balls that were designed to look like animals (I think they came up when I was first googling things). In order to make balls with a face and ears, I  had to switch to a different pattern, so that I had more space for a face, and so that the "middle" would be in the middle of a section (rather than between sections). That's when I found this Free Fabric Balls Tutorial from Stitches and Love. From there I did some designing and came up with a pig, a chicken, and a cow ball that I think are adorable (mostly designed after the finger puppets I made for my quiet book and some other online inspirations).


For each animal, I use french knots for the eyes. For the chicken, I make an orange felt triangular beak and a red ribbon that I fold over and attach between the front and back half of the balls. In these pictures, there are only 2 sections, but sometimes I do 3 sections.

The cow and the pig get pink noses, with stitched nostrils, and ears. I usually make the cow's ears rounder, and place them lower on the face. I put the pig face a little higher up, and make the ears come to a point. I also try to put a fold in the pig's ear when I attach it, though it can be hard when working with such small things).


I have lots of fun making these, and watching them be played with.


I also like playing around with different sizes and types.