Showing posts with label handwork. Show all posts

Monday, April 18, 2022

Favourite Furry Friends

At Christmas time my friend, K, who moved away to England, was able to visit for the first time in two years. Last time we saw her it was Christmas of 2019 and she had a 4 month old baby. This time she was coming back into the country with a 2 year old.

My friend, B, and I knew we wanted to make her son something, but weren't quite sure what. We knew it couldn't be too big, as she had to be able to fly home with whatever it was. And we wanted it to be appealing to a 2 year old :).

We landed on finger puppets as something not too hard for us to make, small enough to pack into a suitcase, and even possible entertainment for the flight home.


We started by looking around online for ideas and then drawing out our samples. We definitely liked different elements from different things we saw online so there was a lot of "well we like the nose from this one, but the teeth on this one".

We had narrowed down our list of animals to Canadian animals so we could remind our friend's son of his heritage :D. 


We pulled out the felt we already owned, but also had to buy some. I have a lovely assortment of rainbow colours of felt. Do you know what doesn't involve a lot of rainbow colours...Canadian animals. In fact, we had to carefully pick and plan our browns so that we didn't end up with a bunch of finger puppets that basically looked identical.


We also hand stitched all of the pieces - with pieces that small it was just easier. Plus the embroidery floss for stitching was a really cute look. We seemed to have the uncanny ability to run out of thread about an inch before the end, no matter how long the thread we started with was.


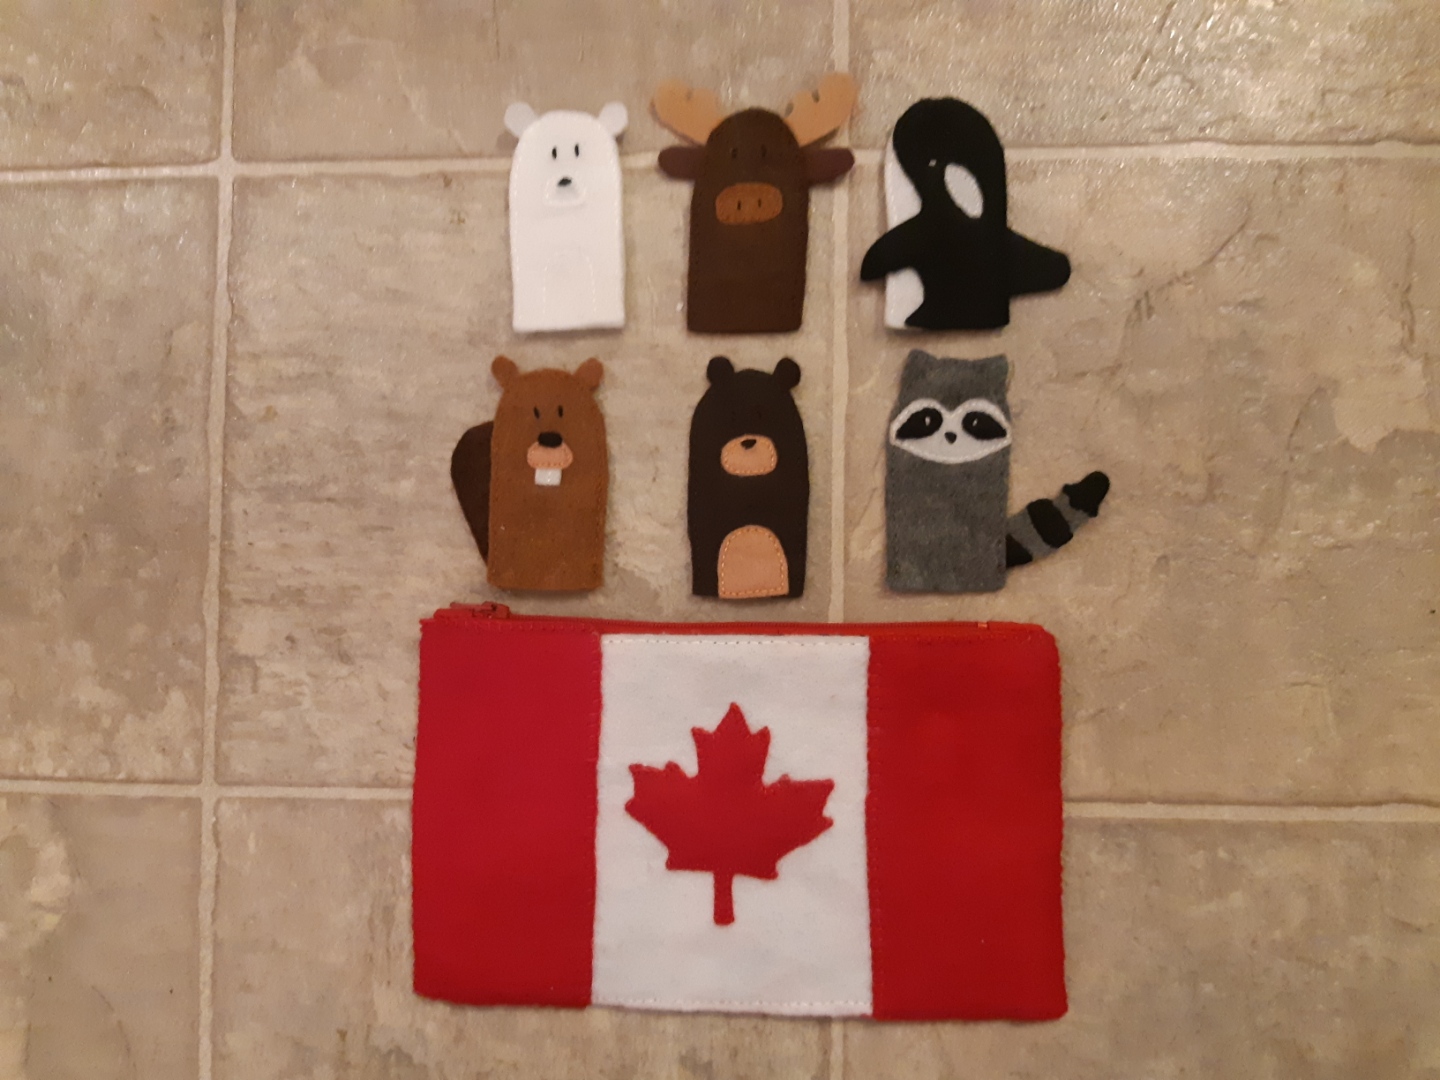
Top left to bottom right we made an orca, a moose, a bear (I don't know if we ever decided whether it was a grizzly or a black bear), a beaver, a polar bear, and a raccoon.


We also made a bag for them that was a Canadian flag. We made a cotton pouch for the interior, so the puppets won't stick to it, and then surrounded it by felt.


We didn't do a great job of documenting, so I don't have pictures of the back of the beaver or the raccoon. The tails on the beaver and the racoon definitely took the longest. We stitched a crosshatch onto the beavers tail, but also planned it out so that enough of the design was sticking out the side. The pieces of the raccoon tail were small enough that having things to stitch through, and not shifting their shape, was difficult.


The orca was definitely my friend B's favourite one. She worked very hard on the design and construction of it. We did it in profile and so made it double-sided. We also stitched it so the flipper isn't stuck down - definitely our most intricate one.

Overall we were very happy with how they came together, and they seemed well received by the recipient. We might have to start thinking about whether there are other Canadian animals that could be added to the collection at a later date.

Saturday, April 9, 2022

Bird Quilt: Part 2

Continuing the quilting journey (from the first part)...

We came home from Christmas break with a quilted quilt.

However, once we got the quilt home, we decided it needed a bit more quilting. We added more circles to the outer Eric Carle fabric (which can really only be seen from the back).


I also drew in some wind lines across the sky, and doubled the quilting around the clouds.


When I was fabric shopping and found the Eric Carle fabric, I also found the perfect backing fabric.


While it wasn't the exact same style of birds, it was still fun, colourful, whimsical birds, and I think it was as close as you can get without having custom designed fabric.

A better view of the quilted circles.

We finished it off with a yellow binding.


Then we packaged it up for delivery at a drive-thru baby shower. 


I love the way a quilt looks when I wrap it up this way. However, I find that when I do, it doesn't get untied and unrolled without explicit instructions. What do you do when you gift a quilt?


To go with the Eric Carle fabric, we also gifted a board book copy of The Very Hungry Caterpillar, and I made a card to match the theme (with the help of my cricut).


I was very pleased with this project and how it came together. I hope the new baby is getting lots of nice snuggles in it.

Thursday, April 7, 2022

Teamwork Makes the Dream Work: Bird Quilt Part 1

Some of the earliest posts on this blog were about a fish quilt that my mom and I made for family friends. Well, when we heard that the brother of the recipient of the first quilt was also having a baby, we knew we needed to get to work again.

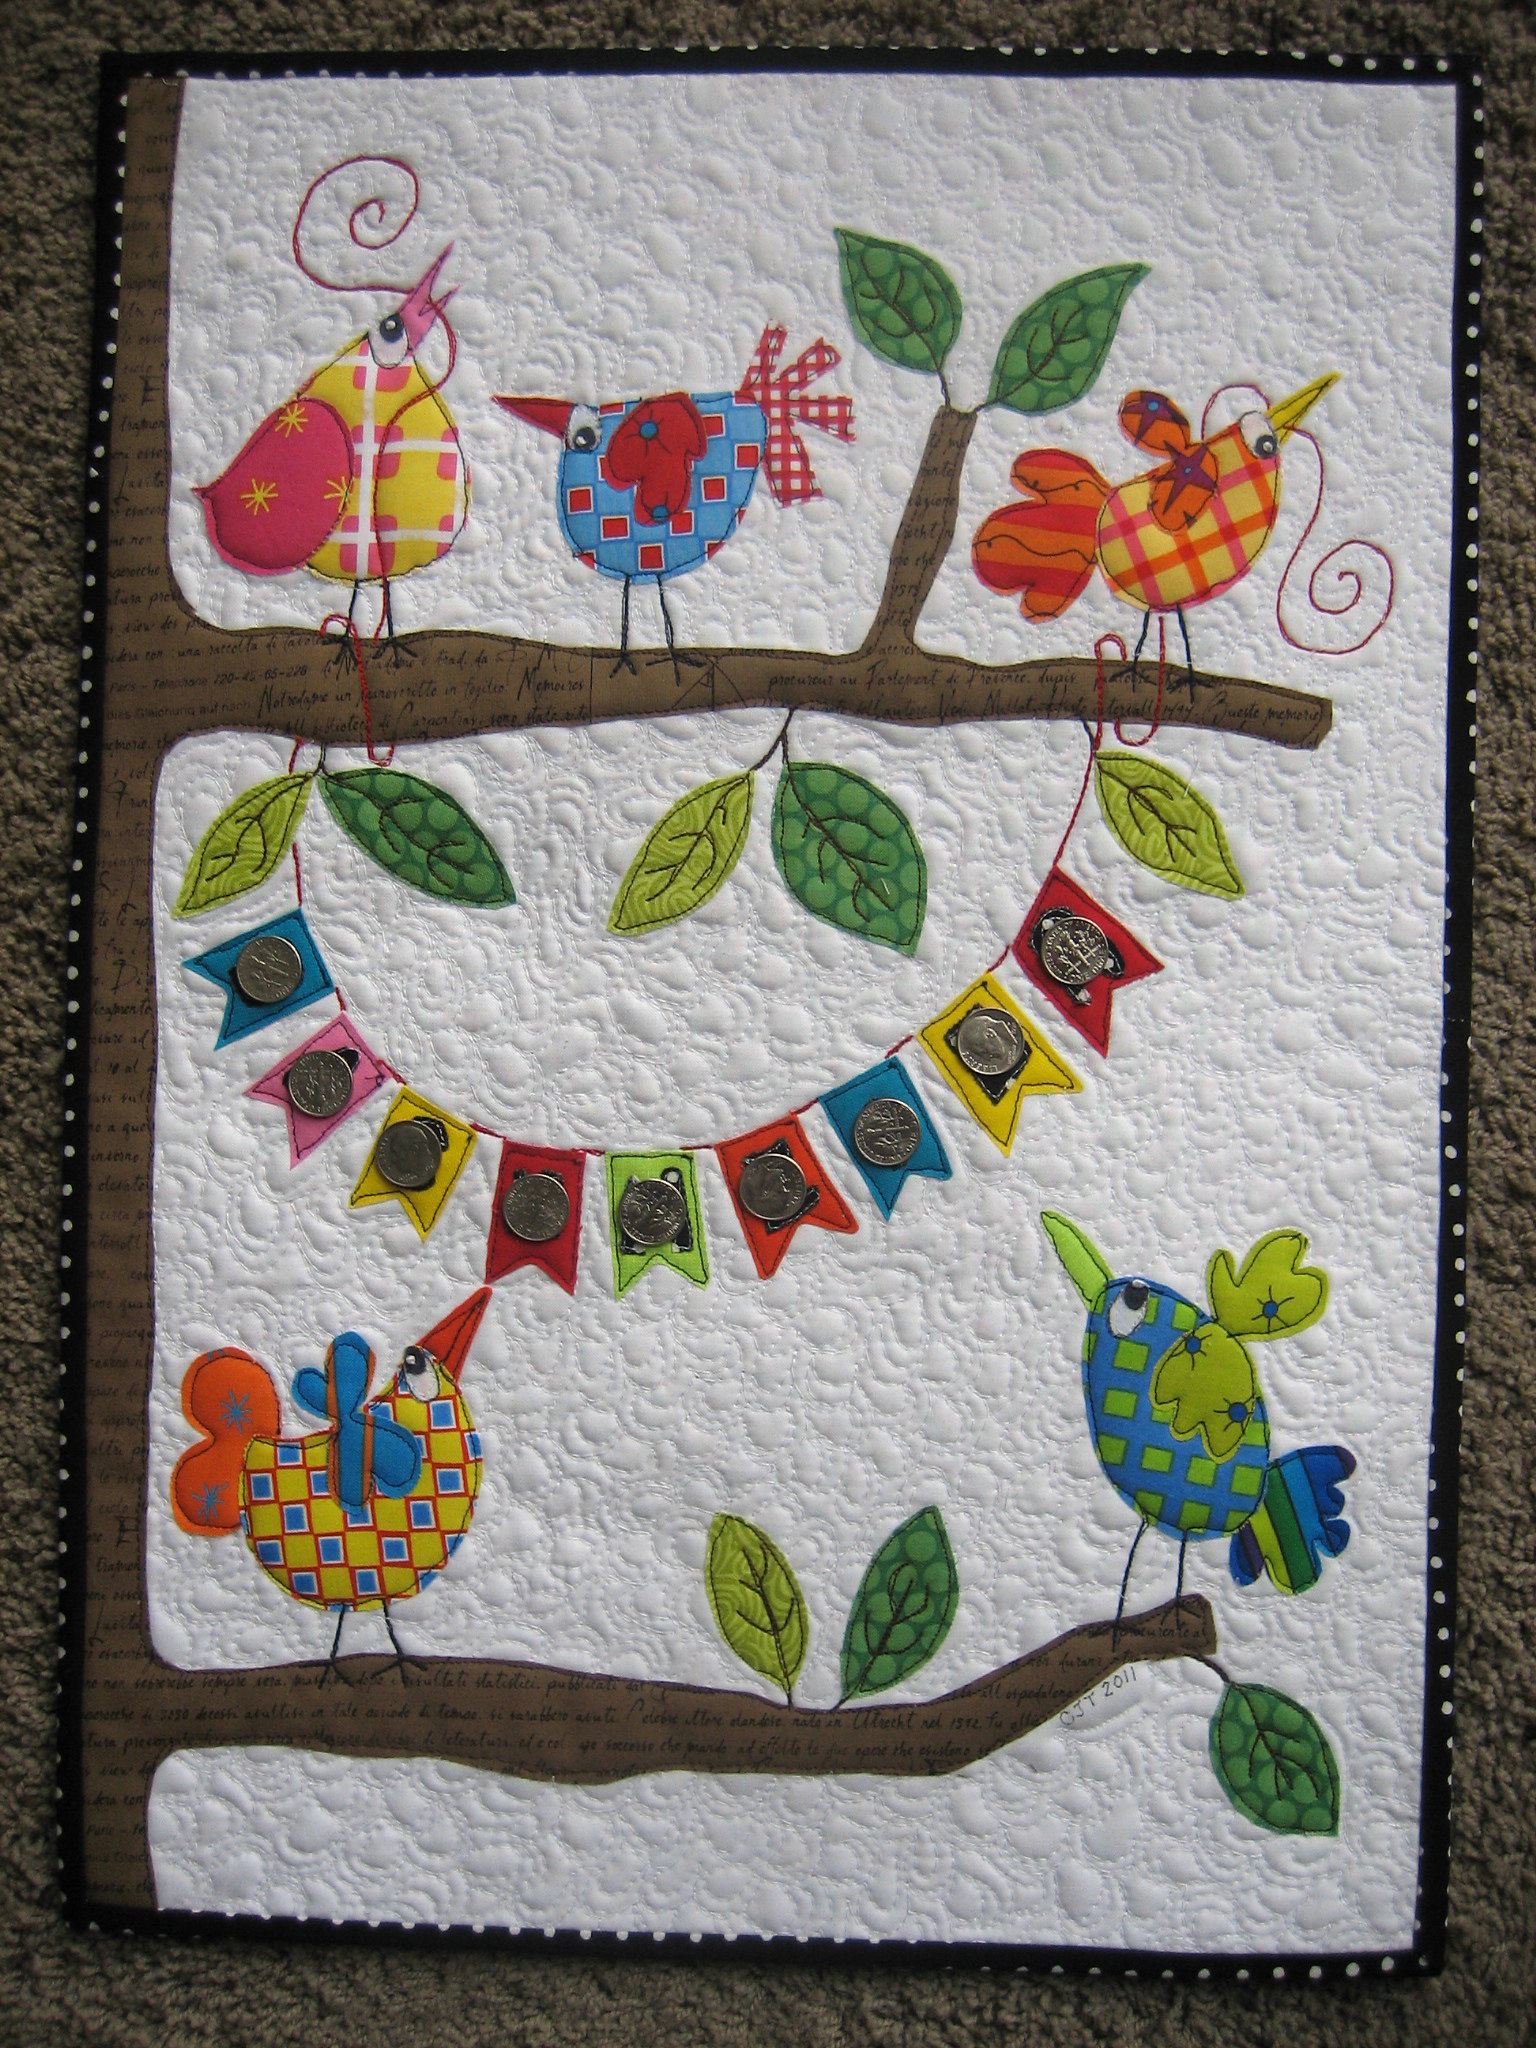
As we looked around for inspiration, we found this quilt that we really liked by Carol. It wasn't until after I designed a quilt around it that I realized that hers was only 15"x20".

A client's wall hanging

I got to work with my pencil and my graph paper.

And once I had an idea I was fairly happy with, it was time to draw it larger. I drew out all the branches on a single piece of paper that was the size I wanted for our quilt. Then I drew each bird on their own pages so I could cut them out and play around with placement, size, etc.


I also headed to the fabric store while they were having a sale and looked for inspiration. I found this colourful Eric Carle fabric that was fantastic, so I snapped that up. And I was able to find a green in my stash that went really well.


The next thing was to pull out our stashes and pick fabric for the various bird while balancing colour and colour placement.

Can you see our vision yet? :D

We decide to do the branches using raw edge applique and stitching it down by machine, which my mom took the lead on.


The leaves and birds we decided to hand applique, which my mom also took the lead on. (This is what happens when two people in two different cities work on a quilt during a pandemic.)

Confirming placement from a distance

The bits of the birds (legs, tails, head pieces), we decided to do by machine as well. (We wanted to make sure the baby quilt was durable for using and washing.) 


Here is a gap for the legs to be added.

Because of this, my mom left parts of the birds open so that I could come in later and do the machine parts.

See the pair of orphaned legs in the middle there?
It was easier to not hand stitch anything yet for that bird.

You might have noticed these birds don't have any eyes yet. We struggled with what to do for the eyes - especially given that we were trying to make a durable baby quilt that also wasn't an insane amount of work. In the end, we decided to use a fabric marker to draw the black parts of the eyes onto white paper. It was set with the iron and then hand appliqued on to the birds. I did this on boxing day while my parents abandoned my brother and I to have Christmas with others :P (Covid restrictions limited who could be there and we had gotten to do Christmas with my parents the day before.) Apparently I didn't document this part of the process.


Over Christmas break we took the quilt up to my grandparents house with us to put in the frames so we could baste it and then quilt it in the hoop later. But as is the case with taking project to gramma's, there's lots of encouragement to keep quilting :). 


We got to do some three-generational quilting on the top and managed to get it quilted and rolled for all the markings we had done.


It's always great to quilt with others (that's often the point of quilting :)), and it was especially nice to have some family time around the quilt after having 2 years of limited interactions. (This was the first time my parents and my brother and I were seeing my grandparents at the same time since Christmas 2019.)

Saturday, March 5, 2022

A Quilt of My Very Own

Next up on the list of "projects I'm getting caught up blogging about" is one of my favourites.

A few years ago I decided it was time to make a project just for me :).

I had seen the City Slicker pattern from Highway 10 Designs a number of times and really enjoyed every version of it I had seen (probably because it was usually made with batiks, which are my absolutely favourite kind of fabrics). I also liked it's simplicity.

A number of years ago at Christmas, I took my supplies up to my grandparents house to get started on the project. It's a great place to get things done - partially because one has lots of time and few responsibilities while there, but also because Gramma is a taskmaster an encourager of completion :D. I cut out all the pieces, and possibly began stitching them, I can't fully remember.

Once the top was put together, I was then in search of a back. I had previously seen a number of mathematically inspired fabrics, and I decided that since this was a project for me and I love math, that I would treat myself to one. However, I seemed to have missed that train, as all the nerdy fabrics had seemed to switch to be chemistry themed. Eventually I found the perfect fabric. It was bright and colourful and fun and covered in math: symbols, equations, and visual representations, oh my! 

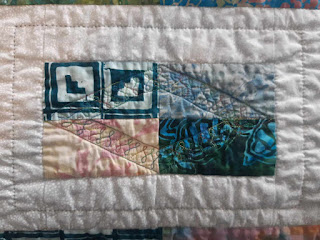
I started by hand quilting the top. I did stitch in the ditch for all the seams. I also quilted around the interiors of each of the white rectangles. I used a brightly coloured variegated thread and sometimes quilted a single line, sometimes a double line, of varying sizes/widths.

Apparently the only pictures I took of the quilting process was when I kept majorly bending my needle. (I lost a lot of needles to this quilt.). It was in the frames 2018 into 2019, which leads me to believe I probably took it up to my grandparents in 2016 to get started (I'd like to think it was actually Christmas of 2017 that I began it, but realistically it was probably 2016).


I began with hand quilting because I am more familiar and comfortable with it. I knew that I also wanted to do some machine quilting on it, so I figured that the hand quilting first would help to stabilize it while I shoved it back and forth through the machine. The big question was, how (and where) did I want to machine quilt it. 

This picture was originally taken to show my Xmas
decorations, but it also gives you a sense of what it's
like to live with a quit in the frames
(and then when it's at its smallest)

So into the closet it went. I wanted to contemplate how I wanted to quilt it, but I also wanted to improve my machine quilting skills before I started on it - I had already put the fabrics I love into it and put a lot of work into the hand quilting, so I didn't want to ruin it on the last step. And in the closet it sat for a couple years. I had gotten an idea of what I wanted to do, but I didn't have the confidence or the brain power to start on it. Then last summer I decided it was finally time - all those quilt challenges (as small as they were) had finally given me the confidence - it was time to seize the day.

Out of the frame (hand quilting done)

I put together a sample version so that I could test out my idea and my skills. Here's the problem: I tried the design that I had been thinking I'd do for probably a year plus, and it didn't work. It didn't look good, it wasn't the right scale for the project, it was going to be much to hard to implement with the full bulk of a quilt. Back to the drawing board.


It was also time for another trip to my grandparents - the perfect place to get work done. I took up my sample and my half-formed ideas. I also brought the real thing with me. I was thinking that I would get started on it and then it would be easy for me to bring it home and just pick it up and work on it in an evening or a weekend (once I had a plan in place and just had to implement it).


I started out slowly. Trying out a few ideas. Still debating how much I wanted to switch things up or do things the same. I decided to draw a diamond shape inside each rectangle. In some of the rectangles I quilted inside the diamond shape.


In some of the rectangles I quilted outside of the diamond shape.


I also decided to do some of the diamonds so they met at the same outer corner instead of being an echo of each other.

I quilted swirls, and loops, and pebbles (oh my). I was starting to feel good about my plans and my work and how far I was going to get before I went home (which was mostly getting over the brain power hurdle so that at home I could just do the work). 


I as having fun and feeling successful. However, partway through the week, there was a major change of plans. We discovered that we had brought bed bugs up to my grandparents with us 😱. This meant two things: 1. Most of my time was spent spraying and moving and checking and cleaning and washing and crying. And 2. There was no way I was bringing home a quilt that could contain bed bugs and there was no way I was washing a quilt that wasn't done being quilted and bound yet.


That left one option: finish the quilt. So, after more than 2 years of it sitting in a closet because I wanted it to be perfect, I had 3 days to finish quilting it. I got busy and quilted every waking hour that I wasn't working or cleaning (and a few where I was working - hooray for camera-off meetings where I don't need to take notes).


And just like that I was able to finish it, get it in the wash, and even take it out for a photoshoot before we left for our long drive home. Special shout out to my mother who took it to an afternoon meeting with her and got most of the binding finished (good thing I had taken up a couple binding options just to see how they looked).

This is what a quilt looks like when you finish it late at night,
you are about to wash it and you're afraidyou might ruin it
in the wash - you get one terribly lit picture just in case
and put it in the washing machine on a wing and a prayer.

Is it perfect? No.
Would I have done things differently with a little more time? Probably.
Would I still not be finished it yet? Probably.


So, while it was nice to get it done, I would have preferred less stressful circumstances around its completion.

And now it lives on my bed, or the couch, or wherever I am, and just makes me happy.

As does the view from 
my grandparents yard