Thursday, April 29, 2021

Sewing Spectacular Part 1: Covid Quilt Challenge #15 Part 1

This past weekend was a sewing spectacular. My friend and I both took time off work to have an extra long weekend. That meant we decided that we could fit two quilt challenges into one weekend. (Fit is a relative term, as you might know from your pants :P - I still have a few stitches to do in my last challenge quilt).

One thing that was different about this challenge was that we knew we wanted to do it in person. However, we usually work separately in our own spaces with our own resources. So we had to plan to enable shared time/space. That meant on Thursday night right after work we skyped to pick our technique and do some planning. The technique we drew this time was "fancy stitches" - time to dig out our sewing machine manuals to see what our machines could do :).

We put my friend's sister in charge of our colour scheme (I thought a colour scheme would help me narrow down what I needed to take to my friend's place in the morning). I think she was heavily influenced by her 4 year old, since we got "rainbow" as our colour scheme. It was a particularly satisfying project to pull fabrics for :).

I had trouble narrowing down the ideas I had, and we had no other plans, so I got over-ambitious and ended up completing 3 projects. One of the down-sides of working together in person was that we weren't taking pictures to send to each other, so I am lacking progress pictures.

For the first project I decided to do a row of rainbow colours with black/white stitching. As I was sketching it out, I decided that I would do 2 rows of rainbow colours in opposite directions - one light and one dark. I also decided to pull fabrics from my small and medium scrap pile and not dig into my bigger pieces, and to use fabrics with a pattern on them (I had a different plan for my solids).

And I even managed to find a backing fabric in my medium scrap bin that I decided would be perfect - rainbows live in the sky :).

Based on the size I wanted I decided to double one of the colours in each row. I didn't want it to be the same colour on both sides and I was trying to keep yellow from lining up with itself, so I picked orange on the dark side and blue on the light side. However, I didn't think through the fact that that meant that the double colours would line up (2 blues across from 2 orange). It wouldn't have been my first choice if I had carefully planned everything out, but I think it worked out fine.

On the dark colours I used white thread, and on the light colours I used black thread. At first I thought the black was going to be too stark of a contrast, so I tried a dark grey, but in the end it didn't contrast enough, so I went with black.

On the dark side, I tried to balance dense stitching with lighter stitching. On the light side, I tried to balance straight line stitches with curved line stitches.

This actually ended up being the last one I added the binding too. I decided that it would be fun to have the binding split like the quilt was. Plus that gave me an opportunity to try something new :). I ended up going both directions on the machine so I didn't have to have another seam on such a small project. However, that really gave my brain a workout to figure out how to mitre the corners in reverse :D. 

For my second project, I decided to do a colour matching of the thread and the fabric. I did another row of rainbow colours in order. This time I separated them with white (which I had plans for :)). I was very excited when I was pulling fabrics that I had mottled fabric in every colour except red (that part was disappointing). Then I remembered I had a block kit from a number of years ago that was mostly red fabrics - I checked and sure enough it had some in the kit, so out it came (it can easily be replaced with another red). I pieced my mottled fabrics with my white separators, and then added a solid black backing. I wanted the coloured thread to really pop on the back.

In the white parts, I did a zig-zag satin stitch in the colour to the left of it (except I only did 1 blue version of this so I could get a purple zig-zag in too). I then picked a stitch for each colour that I did 2 rows of.

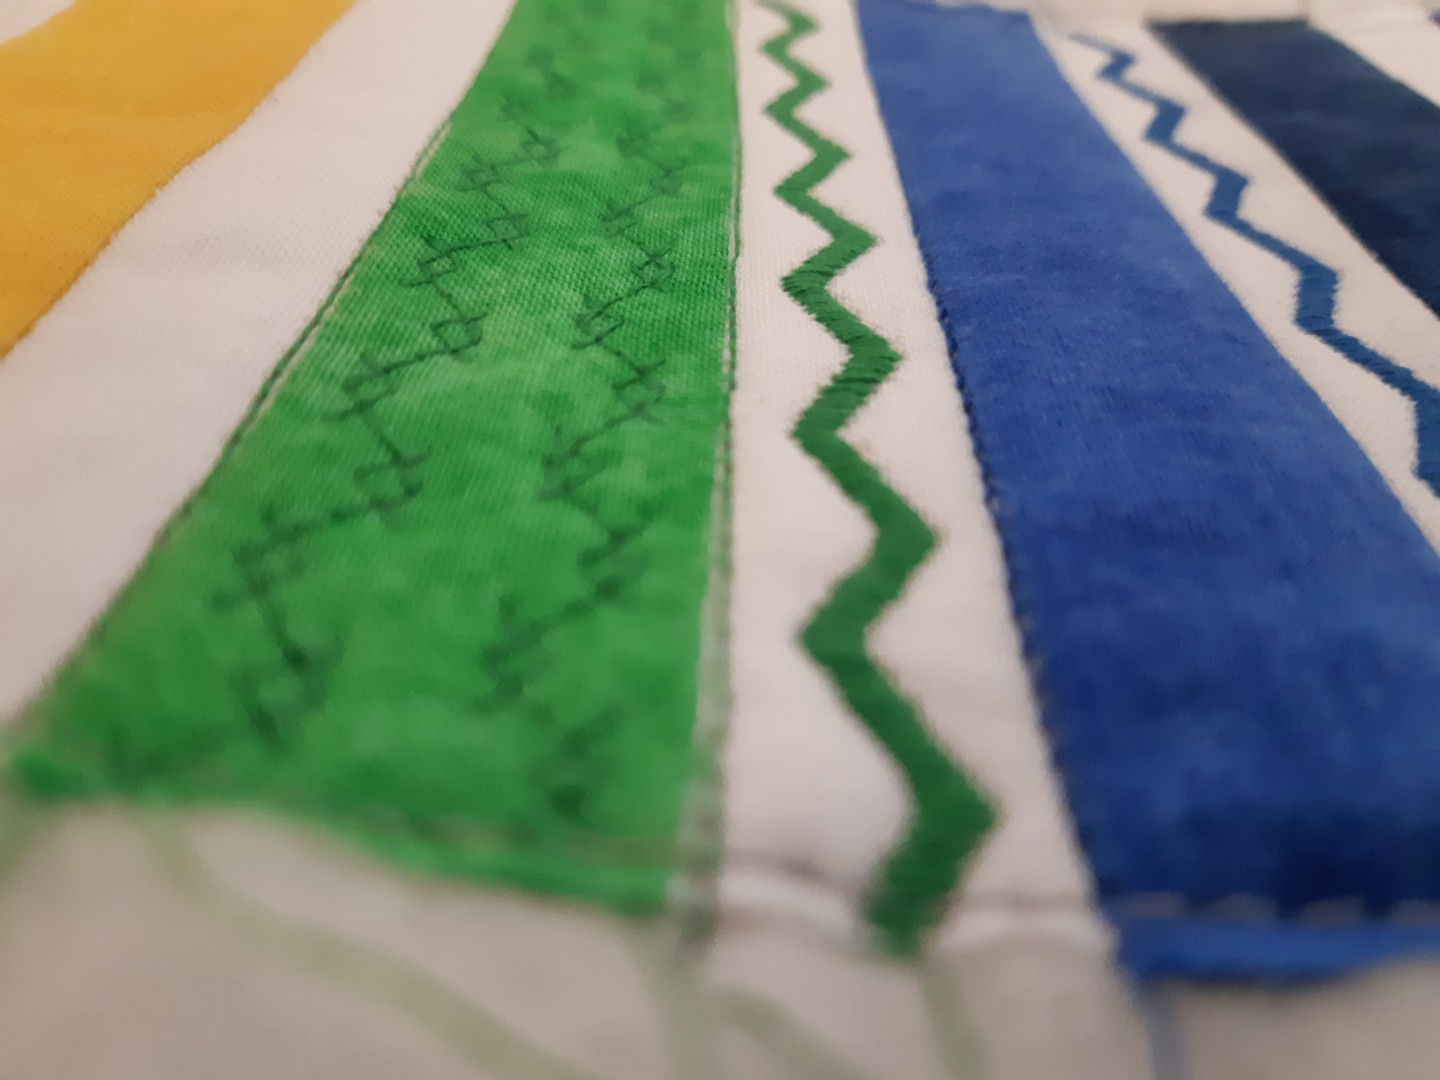
I put some thought into which direction I wanted the stitch to face if it was directional. I also tried to use stitches I hadn't used in my first project. 

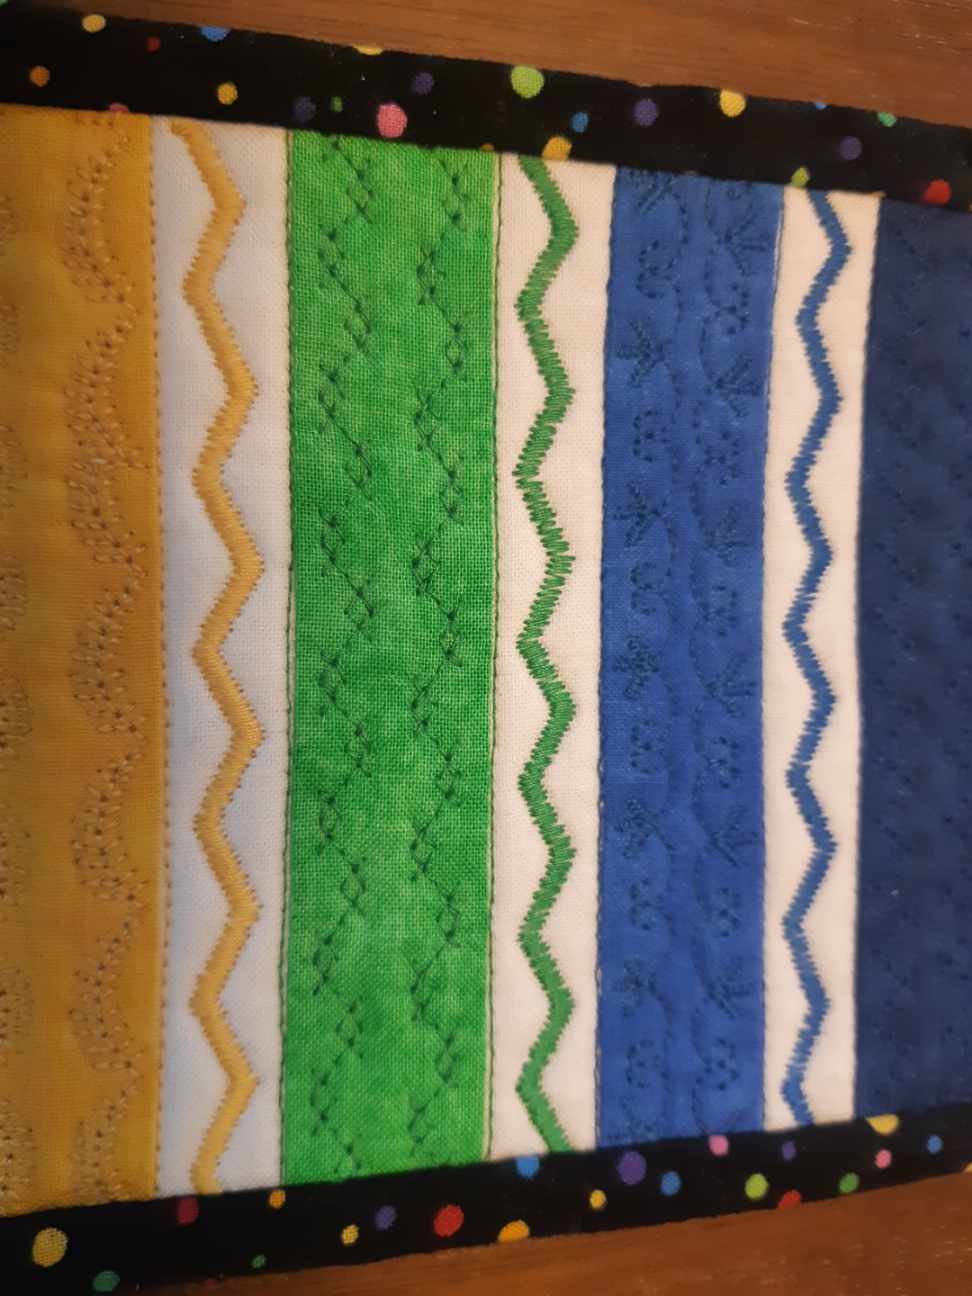
This one I gave a black rainbow polka dot binding to, mostly because I thought it would look good with the back, and I was right. I'm not sure if it enhances the front or not, but it's grown on me on the front and I really like it on the back (which I feel like can be the front sometimes :)).


I'm going to switch to my friend's second project now, because it fits into the category of  "row of rainbow colours" that my first 2 projects also fit into.

My friend chose to use 2 fabrics for each colour - one solid and one patterned.

She then added a white border all the way around, and chose thread colours to "match" the colour they were stitching on. She tried to pick thread that was the same colour, but contrasted enough to still be nicely seen - which was harder than it sounds. Some thread that seemed like it would contrast really just blended in. She chose to have the stitching go all the way through the coloured fabric and extend out into the white border, which is a really nice effect. 

She chose to use a bright blue binding - same "sky" idea as the back I chose on mine. 


And as you can see, hers is also nicely double-sided.

This turned out to be a great project to do together so that we could supply share. We did a tiny bit of fabric swapping, but where it was most helpful was thread and bobbins - there was a lot of sharing going on :D. 

This feels like a long enough post as-is. I will show my last project and my friend's first project in another post :). 

Sunday, April 11, 2021

Block Adoption: An Atlantic Canada Wall Hanging

Full disclosure: I am going back through some picture/projects that I never blogged about. This project was completed in August 2020.

A few years ago (probably more than I want to admit) I was at the thrift store and came across 5 orphaned blocks. They were from the Cantik Batik Canada Mystery blocks designed by the talented Shania Sunga. If I have one weakness in life, it's batiks. (In reality I have many weaknesses in life, but I do LOVE batiks). And here they were, these 5 blocks made of beautiful batiks, fully put together. How could I just leave them there? And so they came home with me.

In the picture, the blocks I got were Northwest Territories (top left), Alberta (top middle), Nunavut (top right), New Brunswick (bottom left), and Nova Scotia (bottom right).

As is true with a lot of fabric I buy, I didn't actually have a plan for them. I wasn't planning on making the entire Canada quilt, I just knew that I couldn't abandon the blocks at the thrift store :). After thinking about it for a bit, I decided that I would like to do just the Atlantic blocks together. I had a friend who followed along with the blocks as the program ran, so she lent me her patterns (and her scraps!) so that I could do my own Newfoundland and PEI. It was even perfect because two of the blocks ran vertically and two of the blocks ran horizontally - it was like they were meant to be put together into a wall hanging. 

Newfoundland block
(sorry about the terrible lighting)
After completing the two other blocks out of my stash (and the provided scraps), I had to figure out a plan.  I already know that I prefer straight stitching on raw edge appliqué. I decided that there were enough little pieces that I did not want to try straight stitching around them through 3 layers. However, I also knew that I didn't want to do quilting over top of the beautiful images. So I made a plan for each block about which parts I would do through a single layer and which parts I would quilt through all 3 layers - trying to balance how much and which parts of the block were quilted all the way through.
As we were in a pandemic, I tried to make do with supplies I had, so I pulled threads that were "close enough" and borrowed from a friend for the rest. (Greens were my downfall).
An example of the stitching I did through the single layer.
I used my computer to design some things I might be able to do with the 4 blocks.
I decided that I liked the look of the strips of different lengths. At first I was thinking that I would pull out colours/fabrics from the blocks and just randomly use them. However, as I started pulling fabrics and laying them out, I decided it would be nice to make the top border be the "sky" and use sunset colours and have the bottom border be the "ground" and used greens for land and blues for water. 
I couldn't decide whether or not I wanted something in the black bit in the middle of the quilt or just do something in there with quilting. In the end I decided to add the blues and yellows to try to pull the blocks together (the blues being the water from in all 4 blocks, but specifically the two vertical ones, the yellows pulling in the yellow sunset and yellows in the tree of the two horizontal blocks).
The next decision was to figure out how to quilt the rest of it. I decided to lean into the "ground" at the bottom and "sky" at the top, so I tried to do waves at the bottom and clouds at the top.
Practice stitching - very important!
The real stuff
This is where I decided that I actually needed to go to the store. Not only did I need shampoo, but I felt like I wanted to make sure I had thread that I was happy with as it was going to show up on the black. I don't normally like to shop at big box stores, but since it was a pandemic, I decided that 1 store where I could get groceries, household supplies, and thread was better for exposure risks.
For the middle section, I did stitch in the ditch on the coloured fabric, and then carried that stripe design through into the black bits as well.
And now time for the photoshoot:
 
 
This project was gifted to a friend's mother (who was my second mother in high school - I still call her "Mommy"). She has a grandbaby that was born out East during the pandemic who she hasn't been able to go and meet in person. While this in no way makes up for that, I thought if she couldn't go out East, I could at least bring a bit of out East to her :).

The other 3 blocks that I got at the thrift store are still waiting for their project :).

Saturday, April 3, 2021

What's the Word: Covid Quilt Challenge #14

This past weekend we undertook another quilt challenge. We had a little less time available than normal, so we decided to hand-pick what we were doing instead of leaving it up to fate. We were thinking of doing improv piecing to help use up some of our scraps. However, we thought that might be too broad with limited time, so we narrowed it down to improv letters: a word in particular.

Neither of us new anything about improv piecing, let alone improv lettering. So, as usual, we started with googling. While there are lots of pictures out there of improv letters, there are not a lot of instructions. Ultimately we decided that it was mostly figuring out piecing order and then just going for it.

That meant that step 1 was picking a word. That's harder than it sounds. You can't google for inspiration, and there are unlimited options (well somewhat limited because it still needs to fit in the given perimeter). I settled on the first word I thought of, which was HOPE. I felt like it was a good word for spring (and maybe trying to project into my life a bit). The spring inspiration made me feel like I wanted to use green fabrics for the letters. I also decided that it would look nice and go with the theme of hope to have the colours go from light at the bottom to dark at the top to represent growth and change.

I felt like this was ae challenge that didn't need a practice round, so I got going pulling greens from my small and medium scraps, sorting them by value, and piecing them together. I had already drawn out my letters and decided the piecing order, so I just had to assign value to the various pieces. Then I used my green bits to start constructing my letters.

Once the letters were made, I attached them together. I had always planned on the H being bigger than the other letters. However, due to "poor planning" (is that a thing with improv piecing?) the E ended up not as tall as the O and the P, which made me a little sad at first. I didn't want to have to redo things, so I pressed on. As I continued working with it, I realized that it also just made it look like the letters were ascending, which also fits in with the theme of hope and growth. So I'm glad I ran with it.

As I started working, I realized I wanted to make my letters a little bigger so that I could have more of a colour sweep. I also knew that I wanted to add some floral embellishments to the quilt so that it was not just letters. But because the letter were bigger, I also wanted to make sure there was enough space for my flowers and stems, so that meant I had to make the space below the letters bigger. With everything a little bigger than I originally planned, this meant I wasn't going to make the perimeter rules. I texted my friend to see what she was thinking, because I didn't really want to compromise the design just to fit the arbitrary perimeter rules. Luckily she said that she was also running big on her letters, so we decided to ignore the perimeter rule this time around.

I quilted the background with swirls that all started from the bottom and grew up. It meant I had to be a little creative with how to fill some of the upper bits above the letters, but I managed to successfully meander my way up there.

I was originally planning on full flowers, but then as I thought about it, I decided that buds would be better to fit in with the theme, so that's what I went with. I also decided I wanted to use up scraps, so I only used fabric I already had with a fusible backing. This limited the size and shape of the leaves I could make, but I think the heart shaped leaves I ended up with are perfect for the project. I added more quilting to stitch these bits down and add a few stems and leaves. I also added some nice sunshine because that's what seems to be giving me hope right now (especially as we go into another lockdown).

I found a perfect binding that was a mix of light and dark green and some yellow. And then the final step was to take it outside in the sunshine for a photo shoot.


Here is the back.

And here it is with what will one day be my daffodils.
Hopefully one day soon 
:).

My friend had a similar inspiration to me (it might have had something to do with the fact that she saw me googling quilted flowers :P). She also made green letters (I think she had more scraps to work with thanks to 3 baby quilts for a sister who loves bright green).

Can you tell what her word is from this :P?

I have to say she was much more ambitious than me in letter formation.


She also decided to add some floral embellishments. She chose to improv piece hers.

But then she had to figure out what to do with them. She didn't like the look of just sticking them on top.

So she started a fun game of unpicking and fitting them in to the piece.


She did some lovely loop-de-loop quilting in her background (this was my second choice for quilting mine :) ). 


And also finished it with a green binding.

We did a good job of unintentionally making the same project :P. I hope they brighten your day the same way they brightened ours.