Monday, March 22, 2021

Salt and Sand Blog Hop

 Today's my day to participate in the Salt and Sand blog hop :).

As soon as I heard the theme I knew exactly what I wanted to do. I took a trip to Flowerpot Island at Tobermory, ON a few years ago with my family (you know, back when we could do things like hang out with family and go places). I took a picture that I knew I wanted to reproduce the second I saw it, but I felt like I didn't have the knowledge, the skills, or the confidence to do that and do it justice.

Then I started doing quilt challenges with my friend. We started doing them about a year ago. We would pick a quilt technique on a Friday night and aimed to each produce something by Sunday night. The only criteria was something with a perimeter of 20-30". We wanted to get out of our comfort zones, get comfortable with a little less planning, and be a little more artistic. You can see all the things we've made up until now on at my Covid Quilt Challenge Round-Up.

Doing these challenges made me feel like I could finally revisit this, and signing up for this blog hop gave me the push I needed. Plus I felt like the colours really fit the theme.

I started by piecing the background. The sharp and distinct changes in the water colour are common for the area and are the original reason I took the picture. I wanted to capture those distinct colour changes and felt like piecing would be the best way to do that.

After that I added the rocks, clouds, and white water as embellishment, made my quilt sandwich, and started stitching. First I went around the added bits. Then I quilted the various backgrounds, adding pebbles, churning water, waves and wind (and it was windy that day).
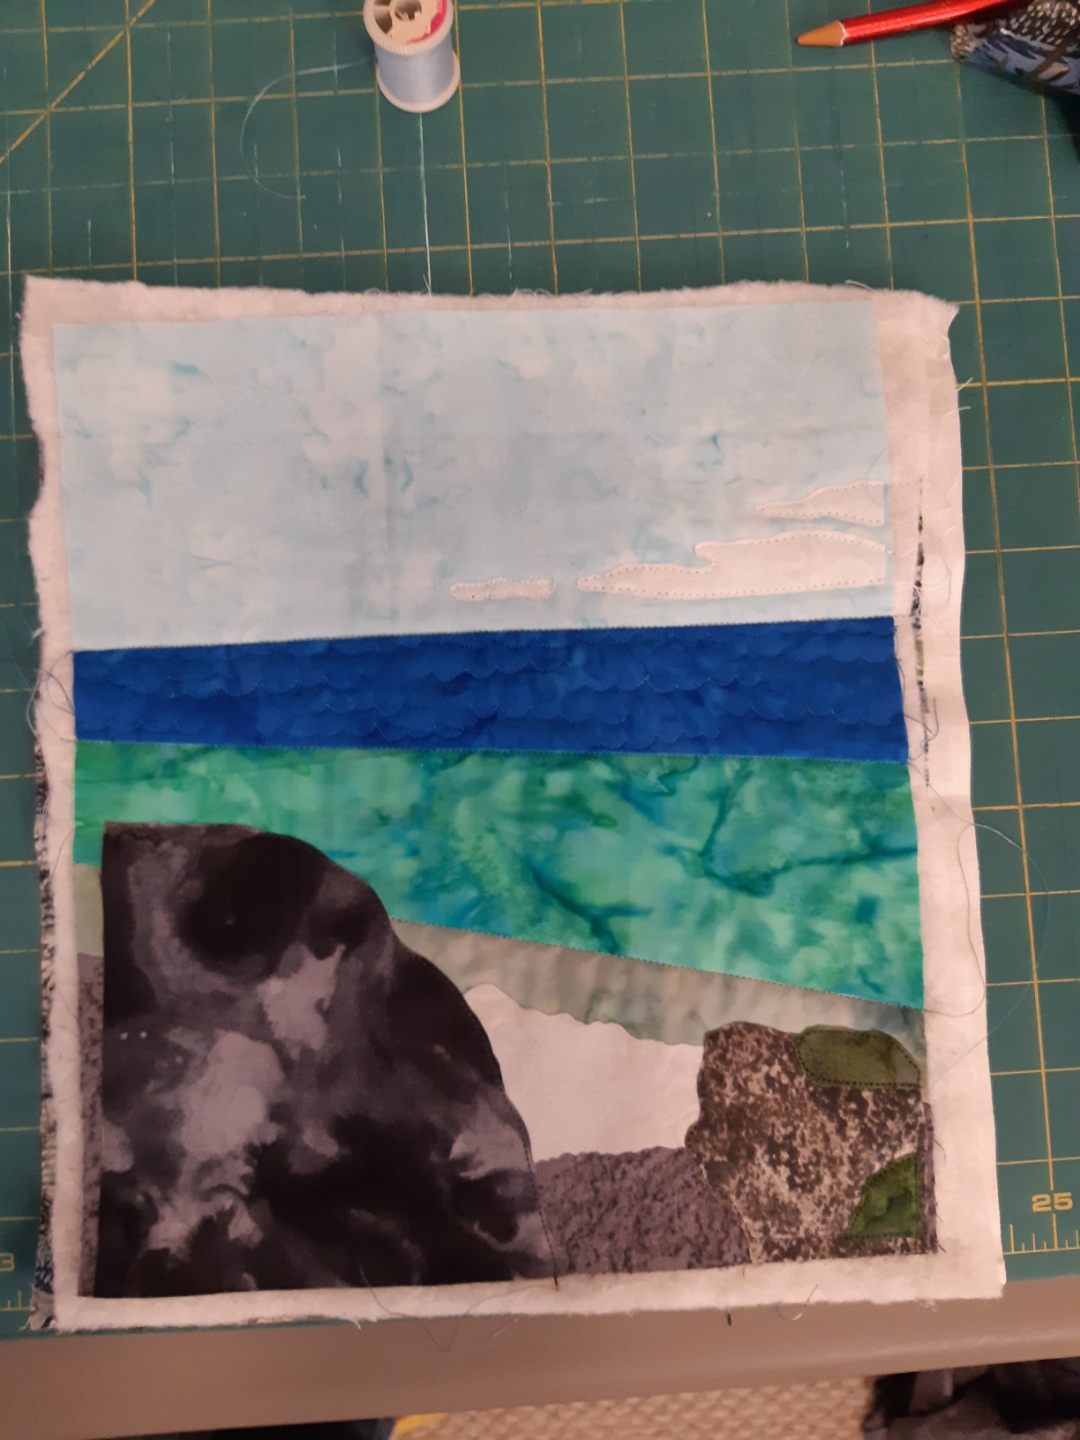
The final step was to add in the branches. I decided to use confetti to do this. I already owned netting, which I bought inspirationally knowing I wanted to do some sort of project with netting (but nothing specific in mind), which I used to encase the confetti bits. At first I cut the confetti into triangles, but I learned the hard way that the holes in the netting were bigger than my triangles :D. That's when I started cutting them into strips, leaving them long enough to not fall through the holes. I went from a very manual cutting process to just running the rotary cutter back and forth quickly and very close together. I used a variety of green and black batiks, stirred them together in a container and sprinkled them around the netting. Then I carefully transferred it to the sewing machine, stitched around the outside, and then just all-over stitched back and forth across the inside. Next time I would do it in two smaller parts instead of one large one, because it was hard to keep it flat on the machine so that the confetti didn't all fall out or to one end as I worked.


I cut out various bits for the ends of the branches, and then used green and brown thread to create the branches leading up to the needles. I filled in a few more branches, and then decided it needed more needles. Some I could add to already existing branches, and some I needed to do more thread work for.

I knew that the back wasn't going to look ideal with all that stitching on the back, so I decided to use a busier background to hide some of that. As I was looking through my stash I found the back fabric I knew I wanted to use: loons. I have a childhood quillow that was made from this fabric, as loons were one of my favourite animals. Being from southern Ontario, I don't have a lot of ocean experience; our water comes in the form of the Great Lakes. And the first time I saw a loon was probably in the same body of water as the picture was taken in, so it seemed fitting to use. (I know lakes don't quite fit the salt and sand theme perfectly, but I figured I could fudge it a bit.)

Lastly, I faced the quilt. I'm so happy with how it turned out, and am amazed at how much I've grown in my skill and confidence in the last year to be able to produce this. I will need to find somewhere to display this.

Thanks for stopping by for the blog hop :). Hope to see you again.

Don't forget to check out the other blogs today and all the other days. I'm sure there's going to be lots of wonderful things to see.

March 22
Creatin' in the Sticks
Selina Quilts
That Fabric Feeling
Days Filled With Joy
Elizabeth Coughlin Designs
Karen's Korner
Homespun Hannah's Blog
Crafts and Math
 
March 23
MooseStashQuilting
Life in the Scrapatch
Food for Thought
For The Love Of Geese
Becky’s Adventures in Quilting and Travel
Karrin’s Crazy World
Sew Many Yarns
Kathy's Kwilts and More
 
March 24
Ms P Designs USA
DayBrook Designs
Vroomans Quilts
Kathleen McMusing
Quilt Schmilt
The Darling Dogwood
Daughters of Dorinda
Annie’s Musings
 
March 25
Quiltscapes
Beaquilter
Stitchin At Home
The Joyful Quilter
Scrapdash
Freckled Fox Quiltery
Quilts Fabric and Thread Tales
Words & Stitches
 
March 26
Just Let Me Quilt
Websterquilt
Quilting Gail
Samelia's Mum
Quilt Fabrication
Little Penguin Quilts
Just Sew Quilter
Inflorescence

Sunday, March 14, 2021

Happy Pi(e) Day

Yesterday I made 3 pies and this morning I made one more in honour of pi day.


I made pecan and chocolate chip pie, which is what I usually do every pie day to take to work. Plus I made a sugar pie and a flapper pie. Both of those were new to me to make and even to taste. As you might be able to tell from the list, I prefer a non-traditional pie. Fruit pie is generally at the bottom of my pie list

Then I spent the afternoon assembling packages (with help from past takeout orders and my new cricut machine 😀😀😀)

And doing pie deliveries. 

8 different families/individuals benefited from my pie day baking 😀.

Wednesday, March 3, 2021

I did a thing

I feel like I've been in a bit of a crafting rut as of late. Been spending my spare time puzzling and reading instead. And lots of just dealing with life. I have a long list of "projects" I've started or want to start that I just haven't been working on. But, instead of tackling those...

... I signed up for a blog hop.


The challenge is to sew something in ocean/sand colors and/or ocean creatures. My day is March 22, which means I really need to get hopping. 


Wednesday, February 24, 2021

Covid Quilt Challenge #13: Bluework

Another week, another quilt challenge. My friend is still away from her normal workspace, so we were still working from the quilt kits I put together for us - which meant blue!

The technique we picked was redwork, but since all we had to work with was blue, we did bluework instead :). The theme that was picked for us was birds. Originally I had made the stipulation that we should do something that wasn't just a recreation of something that already existed, but birds is a hard category to inject some new design/creativity into.

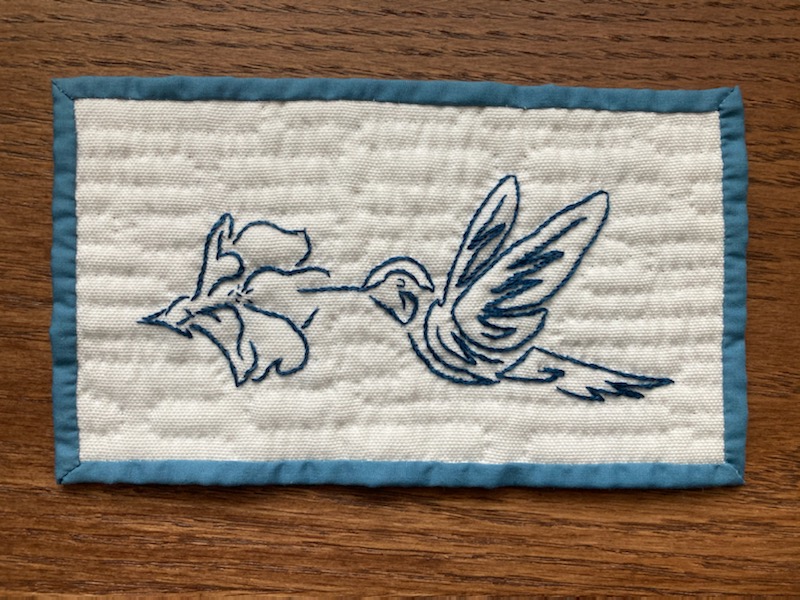
My friend chose to do a humming bird and flower.

She did a better job than me of following the rules and drawing out her own design.

We both ended up doing a stem stitch for our work. She also stuck with tradition and used a single colour for her design.

She hand quilted the background.

And wrapped the backing fabric around to the front for binding. 

Finished piece.


I cheated a little bit more with the criteria - I printed off my design and traced it. But that was because I really liked the look of origami cranes and decided that I couldn't really inject my own flair to that. I did add the stick to the top of the design :).

I used a hoop for my work, though there were times that I felt like it was more in the way than helpful.

I stitched through the white fabric and the batting at the same time. I did this because I didn't want the thread to show through. It mostly worked well, but there were a few times that the batting came through to the front. 

I also used 2 strands for the outline of each bird, and a single thread for each of the inner lines.

I also chose to go the less traditional route and use a different colour for each crane. I liked the idea of an ombre look.

I debated hand quilting vs. machine quilting, but I had a lot going on on the weekend, so I decided to do machine just to save time. I outlined the entire embroidery, and then added vertical lines.

I really like the crisp look it gave.

This project took me back to grade 6 when my class made 1000 paper cranes (I made a significant number of these).

My friend tried to cheat by using this fabric she found at her mom's :P

She was also so inspired that she started another one this week. So lovely :).


Embroidery work is nice to have to work on. Once you've done the planning, you can just work without having to think about things.


Friday, January 29, 2021

Into the Blue: Covid Quilt Challenge #12

It was finally time for another quilt challenge this past weekend. I had previously packed up a travel quilt challenge kit for my friend, when she temporarily moved home, not knowing how long she'd be gone, when she might return, or whether we'd get any quilting done, but I packed out up just in case. I made myself a matching kit, so we could complete challenges with the same supplies. 

We picked out a set of eight 5" Northcott solids to use as our only fabrics (obtained from the Northcott booth when I was at the Syracuse quilt show — at the bottom of the above picture). We also had access to a limited amount of backing and bonding fabric.

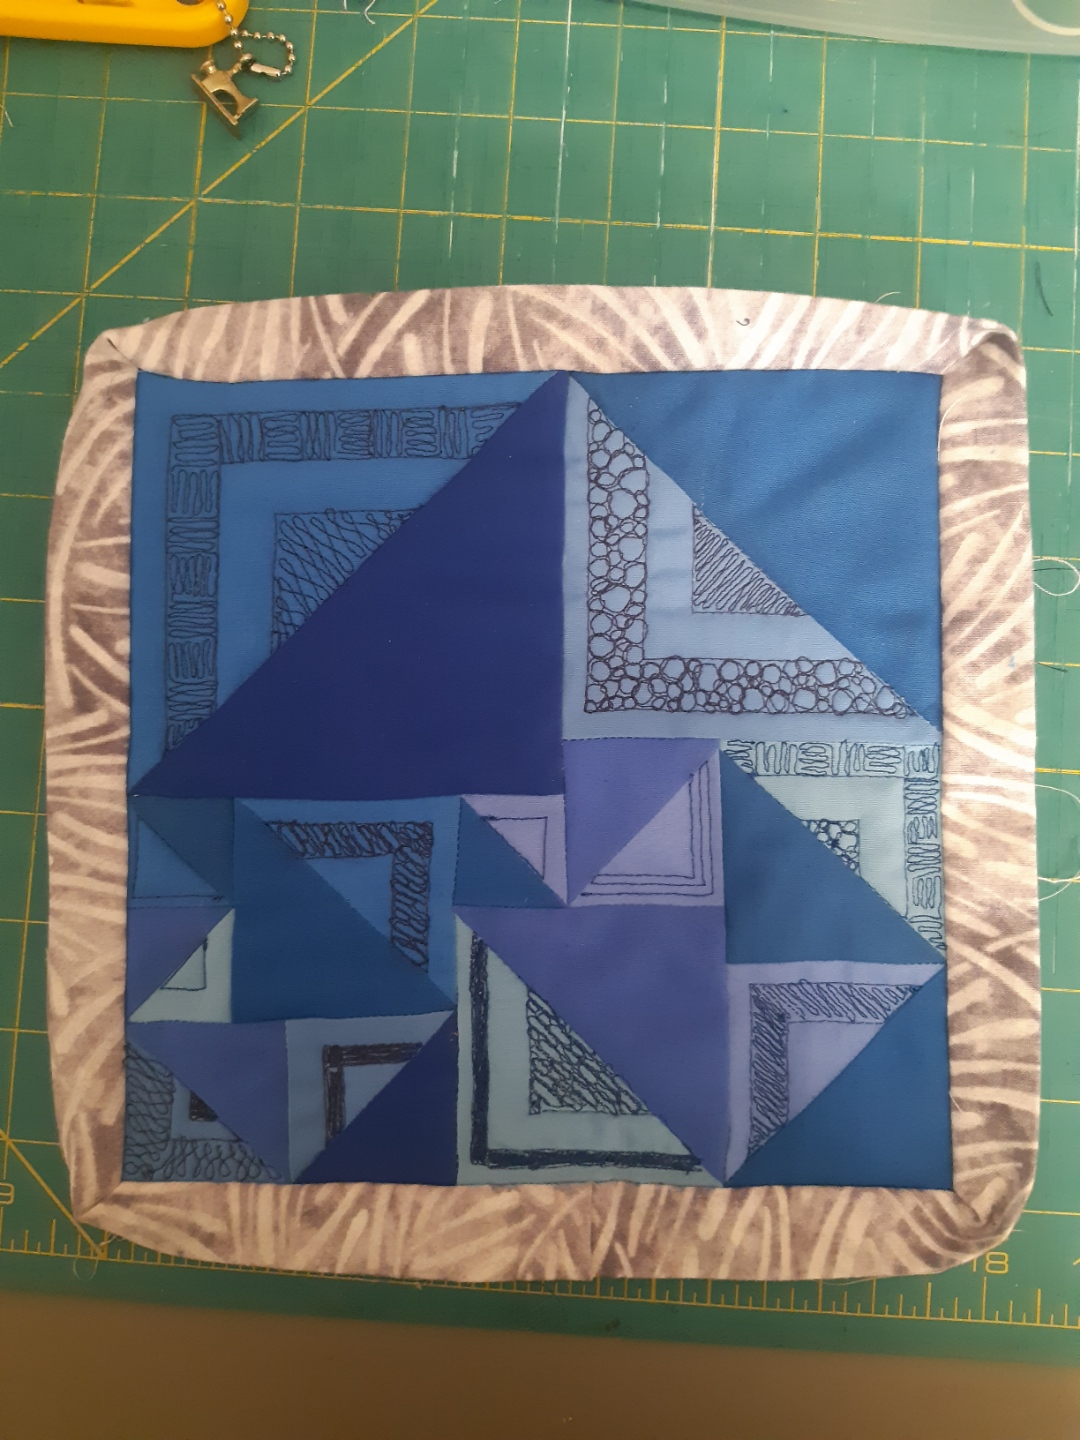
We did our usual random number generation, but with the limited supplies, the first few things that came up didn't really work, so instead we just picked half square triangles as the technique. Since we're both well versed with half square triangles, this challenge was more about design and colour choices.

As soon as we decided on half square triangles, which are actually squares, my brain went straight to the squaring the square problem, which it's a math problem that is near and dear to my heart because of it's connection to Bill Tutte. However, we were working with a limited amount of fabric and a limited perimeter, and I can only make hsts so small, so I wasn't quite sure what I'd do. Then wikipedia gave me my inspiration - the Mrs. Perkin's quilt problem. It's about splitting a larger square into smaller squares, with a quilt being the context. How could I not use it as my inspiration?

I didn't have time to do a math problem and a quilt challenge in one weekend, so I cheated and googled some solutions and picked out one I liked. I cut out the squares, and colored them as hsts and played around with the rotations of the squares. I split the fabrics into 4 darks and 4 lights, though the split wasn't quite that clean. I thought about doing the pairings for the hsts as 2 lights or 2 darkness, since I felt like the squares were the important part of the original design, but ultimately I decided the challenge was half square triangles, so I should honour that. So instead I did each hst as half dark and half light, and then played around with orientation. 


One thing I needed to plan was to make sure I had enough fabric to make the triangles I needed. Another thing I needed to plan was the sewing order - since the design wasn't nicely segmented. I managed to come up with a plan that just involved one partial seam that got finished last. It went fairly well, but could have benefitted from not being on the 1" square.

I didn't really have a quilting plan when I started, and was going to just quilt a few single line squares in each of the squares, possibly some big stitch quilting. However, the day I was going to start quilting, I got a quilting email that showed a quilt with such intricate filler quilting and I was inspired. I decided to fill in some parts of the square and leave some parts of it as the solid fabrics. I had to do some testing to try to find filler designs that I could handle and looked good in the small space they were filling.

At this point I attached the binding. I wanted to use the edge of the squares as a guide for where to quilt, and I didn't trust myself to remember the seam allowance. Plus with that amount of quilting, I thought it would be useful to attach the binding while things were still square. 

I started with the light fabrics, and stitched on them with dark threads. I used my darkest thread on the darker two of the lighter fabrics, and a slightly lighter dark thread on the lighter fabrics (so the contrasts were about the same amount). I started with my walking foot and made the outlines, and then switched to my free motion foot to fill things in.

I got all the light fabrics done and was quite happy with how things looked. However, it was too late to continue working at that point, which was good because it gave me time to think. Originally I was going to quilt the same sections on the dark side of the square, but flip the quilting styles (if there was more than one). A night to sleep on it led me to the decision to invert the sections that were quilted.

I was really happy with the choice in the end. I think it was the perfect balance of accentuating the half square triangles (which was the challenge) and the full squares (which was important for my design). 


My friend chose to do an ombre treatment with the fabrics and use the half square triangles to create flying geese. She did a great job choosing fabrics and doing some intricate piecing. The half square triangles were 0.75" finished. Straight line quilting throughout (except over the triangles) finished the project. I'll let the pictures tell the story :). 


Saturday, January 16, 2021

Walking in a Winter Wonderland

Although there's not much we can do these days, we are still able to get out and exercise. And thankfully, we've had plenty of snow to enjoy!

I've been trying to get out and go skiing or snowshoeing as much as I can to take advantage of the snow we have.

Sometimes I just go through the park in the middle of my neighbourhood.

And sometimes I head to the local golf course to romp around.

The weather has really cooperated to be able to get out and about. I haven't even had to dig out all of my winter gear yet.

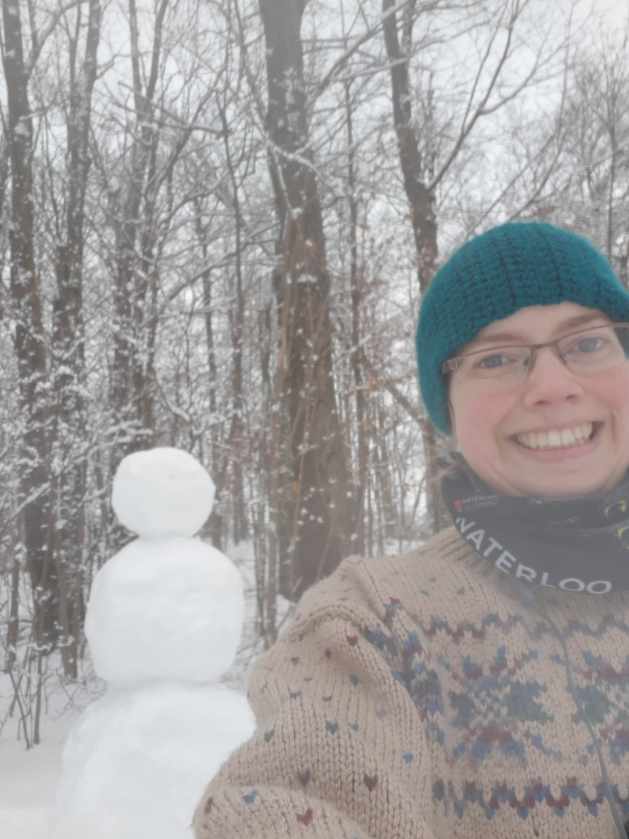
I even found a few friends on my journeys.