Monday, August 17, 2020

Another One Bites the Dust: Covid Quilt Challenge #9

Another week, another challenge. We have some plans (crazy, I know) for the next few weekends, so we decided we needed to do another challenge because it will be a month before we can do the next one. However, I also wasn't sure I was up for another full weekend, full brain power challenge. So this time, instead of randomly picking our challenge we decided to do some freehand machine embroidery (since we felt it would take a little less time/energy to do). It still took a good chunk of my day, but I was able to putter a little bit more.

We started by doing some googling, which was harder than it should have been because we didn't know the right words to use. We found eventually that the words "freehand machine embroidery" got us most of the way there, and then similar image searching narrowed it down for us. We were definitely looking for something a little more basic and we liked the more fun/whimsical ones with black thread outlines. We picked a cake that we liked the look of and decide to both do a version of it for our test piece. Since it was only 3 rectangles of fabric and a cake plate just done of stitching, we decided we could do it fairly quickly.

Mine
My friend's

What I learned was that I can't just freehand things without anything to go off of (as evidenced by my cake plate). I also started with a slight advantage as my friend had never even broken out her quilting foot. But she's a very talented individual and caught on very quickly (plus it helps that it's small pieces that aren't meant to be done perfectly).

This was all accomplished on Friday night. We knew that these projects were a bit less of a time commitment, so we decided we would do a bit of a series that we could possibly revisit another time as well. Because of this, we decided we wanted our things to be the same size and we picked 5" finished (which is the bottom end of our perimeter). For our series we picked a theme of fruit. We decided we would each make 3 fruit pieces.

We each ended up picking a smaller theme for our 3 fruits. I chose "July" as my theme, picking my favourite local fruits that I can get in July — strawberries, cherries, and yellow plums. I decided to do a different number for each piece — 1 strawberry, 2 cherries, and 3 plums — and I also decided that I wanted to incorporate a little bit green into each one (for some consistency).
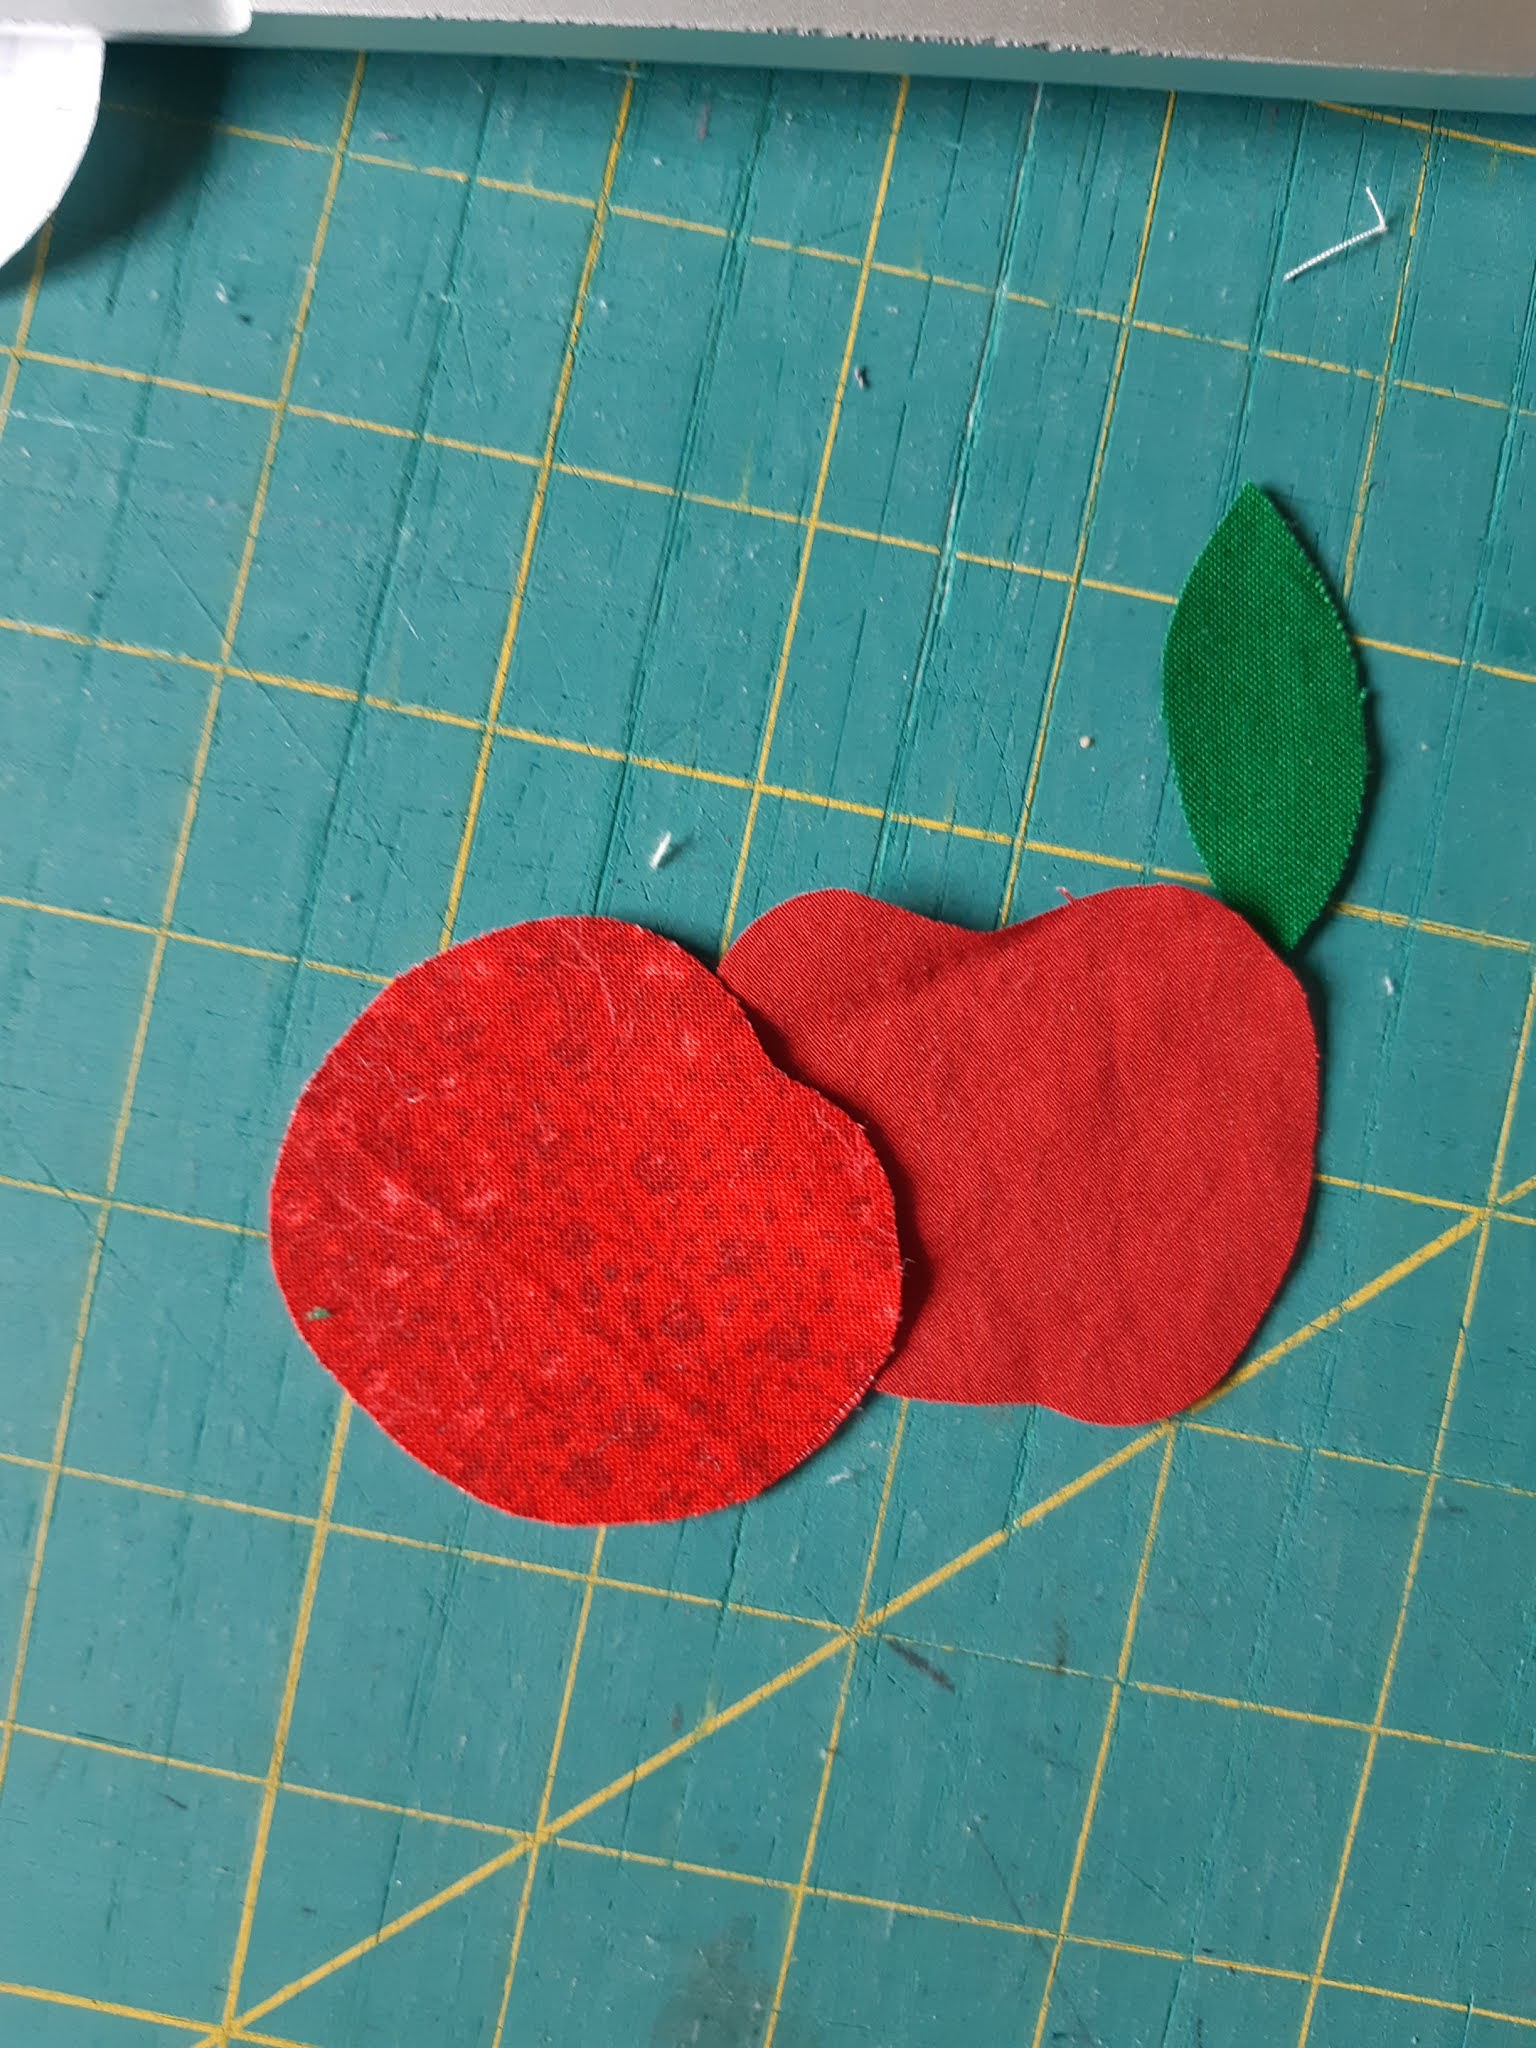
After sketching each one, I cut out paper templates and then fabric pieces, which I laid out how I thought I wanted. Then I attached a little bit of fusible webbing to the pieces just to help them stick in place when I went to stitch them. I was a little worried when I cut the paper out, because there wasn't much of a difference between my plums and my cherries, but getting them in the right colours really made a difference.

After that it was just a matter of stitching things in place with black thread.

Then came the tricky part. We hadn't really decided how we were going to finish them; we just knew we didn't really want to bind them. I had a lot of extra when I worked, so I decided to trim the back and the batting down to size and then fold the front under and around to finish it on the back. I then used my machine stitches to sew around the outside to hold the border in place. I worked from the back to make sure I was stitching where I wanted. The machine work was a little less controllable than I wanted. It made for a very rustic feel, which on this project was fine, but wouldn't be good for things I wanted to look more  polished. If I had been feeling a little more ambitious I could have free-handed something, but I had enough trouble making sure that the edge staged in place and my stitching didn't get too far out of place with the pre-existing stitch that I don't know how successful I would have been.

My friend chose her theme to be "a study in yellow". We did not tell each other our themes or chosen fruit as we worked — we decided it would be more fun that way (and we wouldn't influence one another).  She ended up picking a banana, a pineapple, and a lemon.

She mostly used the same method I did of pre cutting the shapes she wanted and tacking them down with fusible web before stitching them.

However, for her pineapple top, she instead went with another method we had seen which was to use a bigger piece of fabric, stitch what you wanted and then trim down to just outside the stitching lines. She said it was a little difficult because you're basically in no man's land in terms of knowing where to go (instead of having an outline to follow). She used a paper template to help with that.

She also struggled with what to do to finish them. In the end, she decided to face them, but before she did that, she free motion stitched an outer border on them and then attached the facing. She did a very good job getting the outer border lined up before she turned everything under.

I think they look really cute framed from the back too.

Tuesday, August 11, 2020

Covid Quilt Challenge #8: Borders

I don't think we had any idea of what we were getting into when we first started this, nor do we know how long we will continue, but we're starting to get quite a collection of mini quilts.

This weekend's challenge was borders. And it was extra challenging. I think there were a few reasons for this. First, we were busy on Friday night, so we had less planning time than we were used to. Second, this was a very broad and vauge topic, so searching for inspiration was a little more difficult. And finally, we're working with such small dimensions, lots of what you might do in a larger quilt is not really doable at this size. Nothing we had made thus far has had borders on it, so this was a completely new avenue of thought.

My friend decide to make something with a few "blocks" and then a few borders around it. This meant she was working with some very tiny pieces, since the finished size was 8.5"x6".

These pinwheel blocks ended up being 1" finished (craziness!).

She also made a pieced border for the outside which consisted of on point squares side by side. These were done by strip pieces (they can be seen in the previous picture and she claims that they were "pretty easy"). Here they are attached into the 4 sides.

I'm impressed that she managed to get things consistent enough to get the 4 corner squares to work out. She added an inner white border (which was mitred) and a middle colourful border (her colour scheme was based on a previous baby quilt that she has made). Her beautiful tiny piecing makes that white border look huge, but it's only just over an inch wide. 

She machine quilted the outer pieced border and the inner blocks and then did some lovely hand-quilting in the white border.

Here is the cute back, which is fussy cut for some of those front blocks.

And the final product with a ruler for comparison, just to give you a sense of how tiny things are.

I played around with a few ideas before I settled on mine. When we were bouncing some ideas off of each other we kept talking about whether we should be starting with a border idea and then figure out what to put inside it or start with what was going to be on the inside and then build the border ideas around it. Mine kind of came together at the same time. When I started looking at ideas, I tried to pull out what I like about borders, or what I wanted to try, and one thing that stood out for me was that I really like borders that extend the quilt, and also quilts that extend into the borders. And when I started thinking about what could go inside my quilt that was focused on borders, what started out as a cheeky idea, turned out to be exactly what I needed. I started thinking about country borders, mostly as a joke at first, I mean there was no way I was going to fit a picture of Canada inside my borders in that small of a space. But then I was reminded of a trip we took in my childhood to Waterton National Park where we hiked from Canada down into Glacier National Park in the United States. I remember stopping at the border marker, where the trees are clear cut, and them lining up the Americans on their side and the Canadians on our side and having us shake hands.

This is the image that I used for inspiration for my quilt.

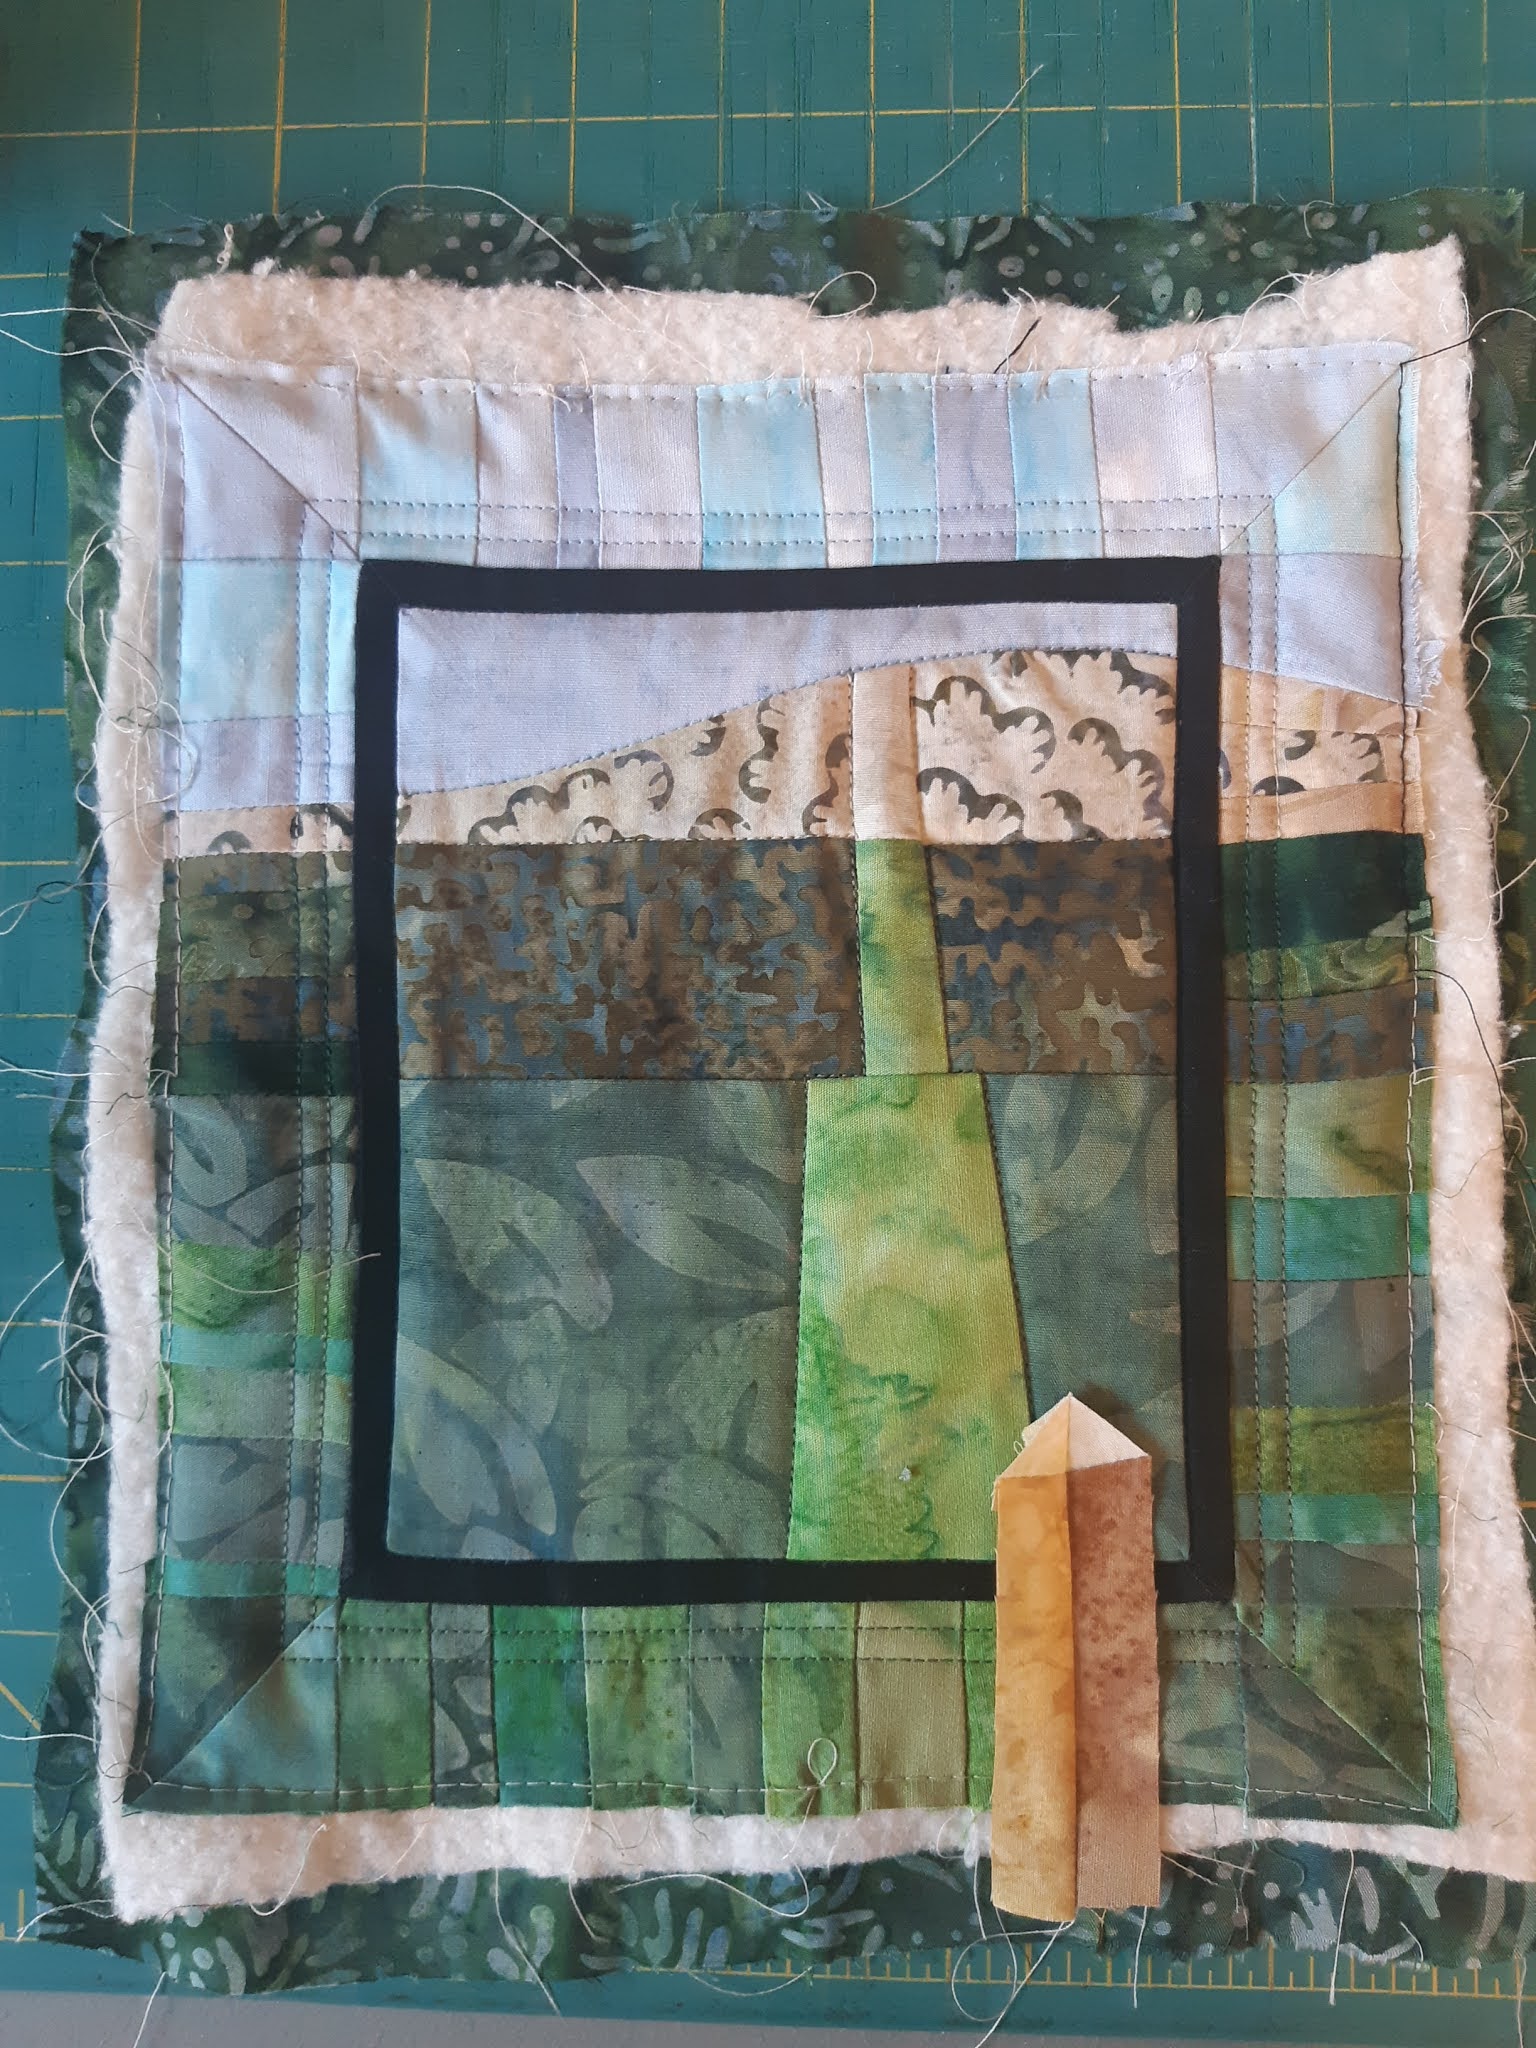
I started by making my scene. I first attached the top two sections of the path, and the top two sections of the mountain, and then cut a section for the path and attached it (after adding in the seam allowance). Once that was done, I added in the curved piecing between the mountain and the sky, and added the bottom tree section with its path.

I made it much larger than it needed to be (mostly I was worried about seam allowances and angles of the path and curves affecting things). Once that was done I trimmed it down and added a black border around it.

Originally I was just going to "insert" the black border into the scene and just have the scene continue on the other side of the black border. But I couldn't just cut it because the curved piece was not going to line up once the seams were sewn, and I didn't want to have to bother with figuring out how to recreate the same curve but with the seam allowance accounted for. And since the challenge was about borders, it felt like cheating to just add the black on top of the whole piece. So I did some more googling and out of the corner of my eye I noticed a pieced border that extended the colours/design of the interior, but wasn't an exact replica. The original one I saw was angled pieces radiating out from the middle. I decided to go with straight lines instead.

I made sure to change colours when the interior changed, and put half square triangles in the corners. This is what I originally had when I went to bed on Saturday night, but I wasn't happy with the dark colour being the highest thing on the mountain on the right, so on Sunday I took it apart and turned it around. I also decided while I had it apart that I would also like to follow the line of the mountain more. I think with the colour switch, it might have been okay as a straight line, but I didn't want to stitch it and change my mind and have to unpick it again (there was enough unplanned unpicking that had to happen I didn't want to deal with planned unpicking), so I changed the angle at the same time. I just eyeballed it, and had to do it a couple times, but in the end, I'm really glad I made the change

For quilting, I added a double line in the outer border, which also matched the colours of the section it was in, so that was a lot of ends to work in. On the mountain on the left, I think there were 3 or 4 stitches in each line and then 4 ends to work in just for those 3-4 stitches.

After that I struggled with whether or not I wanted to add in some tree quilting. I was happy with the abstract sections of the mountain, but I had originally pictured it having trees in the bottom section to help show the perspective. I did a bit of test quilting (it was in the wrong colours because I didn't have all the green thread I wanted in the first place — as it stands I did run out of at least one of my green threads — so I didn't want to waste any). But even that didn't help me decide what I wanted to do.

Eventually I decided that the whole point of these was to try new things and develop skills, and if I didn't try it, then I would never know if that was something I was capable of pulling off, but also something that would look good (sometimes you have to do something in order to figure out you don't want to do it). I was really worried about "ruining" my quilt, but I think I did a fairly good job, and I like the way it turned out.

I originally had the trees a little more spread out, but then I added one that was closer to the others than I had intended, so then I had to add a few more that were close to the others so that one didn't seem out of place. I had even "mapped" it out a bit, but I had to be fairly fluid with where they went and how they looked based on how the quilting went and how much thread I had. It also helps to reiterate a lesson I need to learn, which is that things don't have to "match" as much as I think they should/want them to. A couple of those threads when they were sitting with the other ones really stood out, and if I had more green thread options, I never would have chosen them, but they really helped give things some depth and variety.

I decided because of the borders/design that binding wasn't the way I wanted to go, so I tried my hand at facing again. I tried a slightly different technique this time, and each one has it's pros/cons. I also made the facing much skinner than last time (since I'm working on a much smaller scale. I decided not to worry too much about the quilting on the back on this one — I didn't have enough green thread to worry about it too much and I didn't want to ruin the front by worrying too much about the back. 

I pieced and attached the border marker over top of the quilted border lines and the inner black border (before the facing) to finish the look.

This is definitely one of my favourites and I can definitely see where things I've done in other challenges helped me with this one (not necessarily particular techniques, though I did use curved piecing again, but also just some general confidence and ideas and willingness to try things).

Monday, July 27, 2020

Perfect Piping: Covid Quilt Challenge #7

Well, we were at it again. I'm a week late in posting this one, but I tried to sneak in two projects again in one weekend and I didn't quite make it (too much pool time and not enough week night motivation).

This time, the technique that we were to use was piping (though maybe not perfectly as the title suggests). We also randomly selected a colour palette. This added an extra challenge since these were not necessarily colours we would normally pick together, and also trying to find fabric that fit in to the colour palette.
We started the same as always: with some skyping and some personal browsing. You had to remember to add the word "quilt" or "sewing" to your search of you ended up with a lot of delicious looking cupcakes. It was also interesting to think about how to maybe do piping in a non-traditional kind of way. After coming up with a few ideas and doing a bit of testing, we were off to the races.

I had a couple of ideas, but decided to start with my second one because although I liked my other idea a bit better, this one was more of a challenge, and I thought if I didn't start with it, I might never do it. It was triggered by the fact that cupcakes were what you ended up with in a google search for piping.

Coming up with the right order to do things in for this one in order to make it a 3 layer quilt was interesting. I started by creating a piped cupcake cup for the bottom. The piping was slightly angled and between each section of the cup, but in the end the angle wasn't that noticeable.
Next I outlined the sides and bottom of the cup with piping. Then I sewed that, right sides together, with the cupcake top, layered on top of some batting. I did things in this order so that I could pipe the edge of the bottom of the cupcake but not the top. I am very happy with this decision. Even on the bottom where I just had a couple of corners to turn, I had a bit of an issue with the seams catching (which I fixed by hand once things were together).
After putting the top together with the batting, I put it right sides together with the back and stitched most of the way around, leaving a little bit of a gap so that I could turn it right side out. This was a bit of a challenge because I couldn't really see exactly where my piping was to make sure I was lining things up well, but it turned out quite well. Once it was turned, I hand stitched it closed. My quilt was together and ready for quilting.
I started by quilting on either side of the piping on the bottom. I think this helped my piping stand up, as one of the issues with this challenge was that I didn't really have anything that you would use in piping at home. I ended up using yarn, which doesn't have the structure you might want in piping. After that I quilted some swirls in the icing to represent the icing piping that a cupcake might have. I was very happy with how it turned out.
Next I created a cherry for my cupcake. I created red piping (with the tiny scraps of cording that I did have laying around from the time I added piping to a pillow I made). Then I just wound that red piping, with the seam allowance, around itself and hand-stitched it together. I debating between having the clean side or the side with the loose threads showing. In the end I decided on the scraggly side up so I attached it that way, and I like it. It's a nice contrast to the neatness of the rest of the project.
The final step was to add the sprinkles. This was also how I got the other colours from the colour palette worked in as well (thanks to an embroidery thread loan from my friend — I traded for pool time). I made sure to stitch through nicely to both sides, so the sprinkles would look good either way.
I do have to confess that although I drew it to be 20" (the minimum of our projects), because of some of the seam allowances with the piping, it ended up measuring 19.5", so I guess I'm disqualified on this one.

My friend decided to go with her abstract artistic side on this one. She had some actual cording, but then had to figure out how to work that in to seams/binding (I didn't have that issue since my yarn was easily sewn over top of). She also had to get a little creative since she didn't have quite enough of the one fabric that she wanted.
She played with colours and angle nicely.
Squared it up.
And quilted it. She quilted on either side of the piping and continued that spacing/quilting below the piping as well. I really like the design she quilted in the grey space. (Though lots of loose ends to work in from the piping quilting.)
The binding was added, and it was complete!
 

In my second project I was also attempting to bring out my abstract artistic side. It was one of the first ideas I had when piping came up, but I was worried that it didn't highlight piping, just used it. However, now that it's complete I don't feel like that.
For this one I had to dig back in my covid quilt challenge skills and do some curved piecing. However, this was with the added challenge of putting piping in the seam as well. It turned out fairly well considering.
Once the piping was in place, the top was done. Or at least as done as it was going to get before I started the quilting. I added a red circle, which I stitched down with a free motion swirl. After that, it was just a matter of adding in lots of stitching. Some I did with the machine, some I did by hand. I also added in some yarn that I stitched down on top of the quilt. I was trying not to switch the machine thread too much, so I didn't do all the stitching in the order that might have made sense/made the designing go a little better.
I tried pick hand stitching that would look good on either side of the quilt, which made for some interesting stitching techniques.
I'm happy with all of it, though I do wish I had done something a little different in the grey section. It doesn't help that I don't really do embroidery work, so I just did a quick google and picked a few things that I thought might work okay on both sides.
I found a backing fabric that worked
nicely with the colour palette
The part that really hung me up with the piping with the binding. I debated about whether to do real piping in the binding or do a faux piping binding. I decided to go with the faux piping binding, and I think it would have gone okay if I hadn't read so many different instructions (I have this problem with recipes too). I accidentally attached the binding back to itself incorrectly, so you can see on the right side, there is a bit of bulkiness and things didn't actually properly line up. I also struggled with getting the corners lined up, but I'm not used to machine stitching both sides of the binding. It wasn't my favourite technique, and though I like the look it gave, I'm not sure I would rush out to do it again.

Monday, July 13, 2020

Covid Quilt Challenge #6: Yo-yos!

Life has gotten a little busier now that things are getting a little more back to normal (yay for getting to go strawberry picking :) ), so it's been a while since we did one of these. The challenge this time was yo-yos. We decided not to add a secondary part to the challenge this time, just yo-yos.

My friend decided to make a number of different-sized yo-yos for her piece. I think she did a bit more planning than me, since she said "I need 19 yo-yos" and I just made yo-yos and laid them out until there were enough.

She first created her background, which she decided to try some different dimensions than what she had been doing for the others. She fused and quilted circles onto the background.
Once that was ready she placed her yo-yos down and bound it. She added some interest by having a couple of them "stick" off the edge.
She auditioned some stitching:
And in the end decided to go for it.

I forgot to take many process pictures this time around. Friday night was spent as usual: brainstorming and doing a little testing. I never did figure out how to get my yo-yos as tight as my friend got hers, but they looked fine, so I went with it. I decided that I wanted to use bright colours for my yo-yos and was thinking of a couple different designs that I was going to try once I got the yo-yos made, but I got the first one laid out and really liked it, so went with it. It was an L-shaped overlapping borderish design. I think that has been one of the designs I had considered for the last challenge as well, so that shape was already in my head and needed to come out :)

I also made a few different sized yo-yos, some of which I stacked on top of each other, others I left as single yo-yos. I added some buttons to a few of them, which also helped cover up some of my bigger holes. I was originally going to piece a background for it, but then I had this grey chevron fabric sitting on my ironing board that I had gotten at the thrift store a while ago that was just calling out to be used with the bright colours. I decided to quilt mine first (white stitching in the white chevrons), then attach the yo-yos, and finally attach the binding. (You can't see in the picture but the line of quilting going under the top green yo-yo is done in yellow).
I love how bright and sunshiny and fun it is :)

Here are the backs: