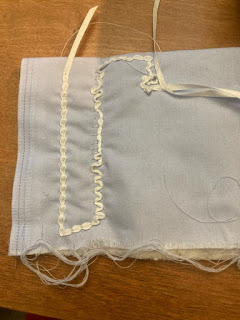
We did our next challenge this past weekend. Apparently I started writing this post and forgot about it, so it's actually been almost 2 months since our last challenge. The topic we drew was bobbin work. This was an interesting one because neither of us really had an idea of what it was or what was involved.
As usual, Friday night started out with googling and Saturday started with testing. I did less planning on Friday night, because until I did the testing, I really didn't have an idea of what would happen or what kind of ideas might make sense.
This is what my testing looked like. See how helpful it looks :P?
It actually gave me a good sense of which materials would work and which ones wouldn't. It also gave me a sense of how to work with each material. Some did better going through the bobbin tension and some didn't. Some benefited from a top tension change, some didn't. Little experiments helped with this. Especially taking care to go slow at the beginning - I did snarl up my machine a couple times.
My key feature was my ribbon yarn. I had a spool left from when it was popular and I had made my mother a scarf out of it. I really liked what it did when run through the machine - it bunched up in a ruffle/rouched kind of way and looked really cool. Plus it was gradated, and so looked very interesting. That led me to deciding that I wanted it to be the main part of my design.
I started by quilting the entire background. I wasn't fully thinking when I picked the backing fabric. I know I had a reason, but I don't remember what it was, and because I had a dark background fabric and light backing fabric, it meant I had a dark top thread and light bobbin thread, and my machine quilting skills aren't good enough that that was a good idea.
After that, I traced the outline of what I wanted on the back fabric, so that I could do the bobbin work upside-down and know where I was going. I had decided to make a butterfly. I started with the main outline with the ribbon yarn that I loved so much.
From there, I added a yellow outline with a thick jeans thread, and a blue ribbon accent created with a zig-zag stitch. The body of the butterfly was created using a zig-zag stitch that I varied in width to create the shape I wanted.
Next I added buttons as accents as well.
To finish it off, I faced the project, and then zig-zagged the ribbon yarn around the edges as well.
Overall, I was very happy with how it turned out - especially given at the start of the weekend, I didn't even know what bobbin work meant.
Okay, onto my friend's project. At the best of times I am just piecing together (haha - no pun intended) what I think she did. An now it's been 2 months since she would have told me anything, so this will mostly be a series of pictures of the progress of her project.
pic
Again, I think the thing that really drove our design decisions was the types of threads we had, and how they interacted with the machine.
This is the design she chose to do.
She used 3 different threads to complete the design.
Her big things were working through what order to sew which lines in, and also doing the filament in the lightbulb as a free motion design (but going over it 3 times to get a thicker line - I think she did an incredible job of following the same line every time).
Except for the small black square of fabric, everything else was done with bobbin work.
She also chose to do her bobbin work through all 3 layers, so counted that as her quilting as well.


Certainly interesting pieces. Must admit I don’t really know about bobbin work so will have to turn to google myself.
ReplyDelete